Download Webex App
You can get Webex for your mobile device. Install it on multiple devices and switch between them hassle-free. Your content stays in sync because everything is stored digitally. To download the Webex application to your mobile device, follow these steps:
Note: If you are migrating a service from UC-One to Webex, the login sequence below does not apply.
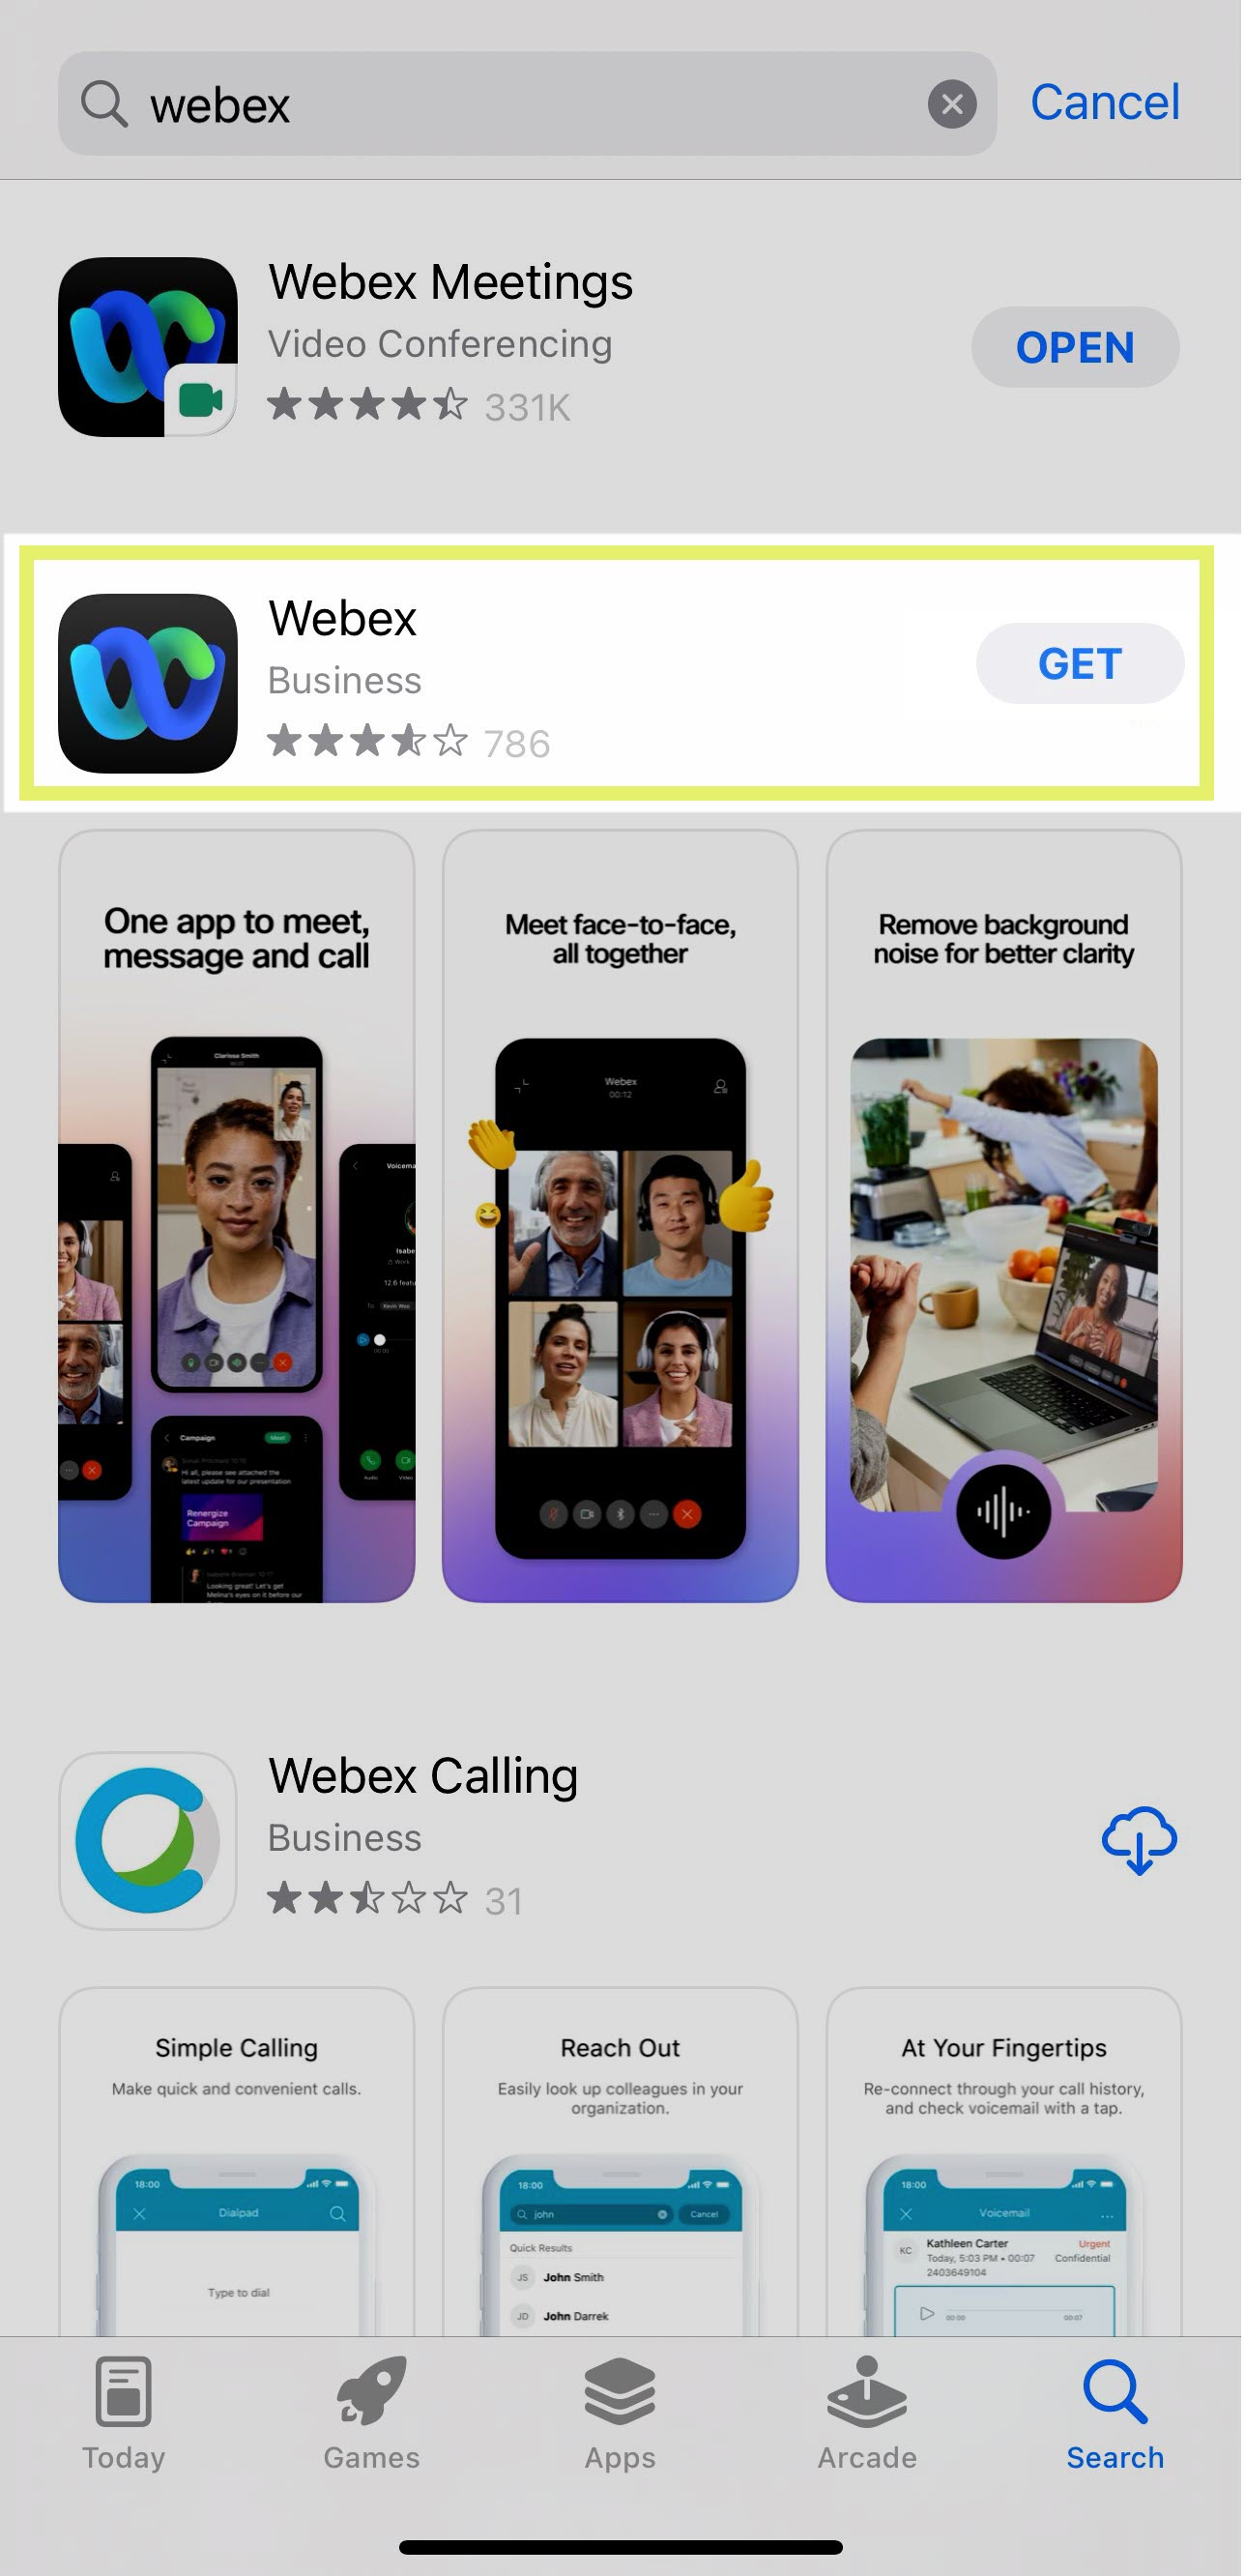
1. Go to the App Store. Search Webex.
Note: Make sure to download Webex and not Webex Meetings (refer to screenshot below).
2. Tap GET.
3. Once downloaded, tap OPEN.
Sign In for the First Time
To sign into the Webex application:
1. On the login screen, enter your email address.
2. Enter the password for this account.
Webex Overview
Let’s take a look at some of the main areas of this application.

1. People and Spaces List
Appear on the left so you can get to them whenever you need to. At the top are your latest active spaces. If you've been added to a new team or space by anyone, you'll see it here too. You will see a bold space name when someone has posted a new message in space.
2. Navigation Menu
Switch easily among your message, team, call, and meeting views. Messages appear by default, but your teams, calls, and meetings are just a click away.
3. Profile and Preferences
In the app header, tap your profile to update your picture or name, access your settings and preferences, and set your availability.
4. Search
To search content within the app, tap Search in the navigation menu. You can search here for direct messages, spaces, files, and more.
5. Messages
The messaging tab is the default screen for the mobile app. Messages are where you chat with colleagues. We keep these messages secure so you can feel confident sharing your work ideas in Webex.
Upload Your Picture
In Webex, make it easier for individuals to identify you by adding an image to your profile. Your profile depicts only your initials within a circle before you upload one. To upload your picture:
1. In the app header, tap your profile picture.
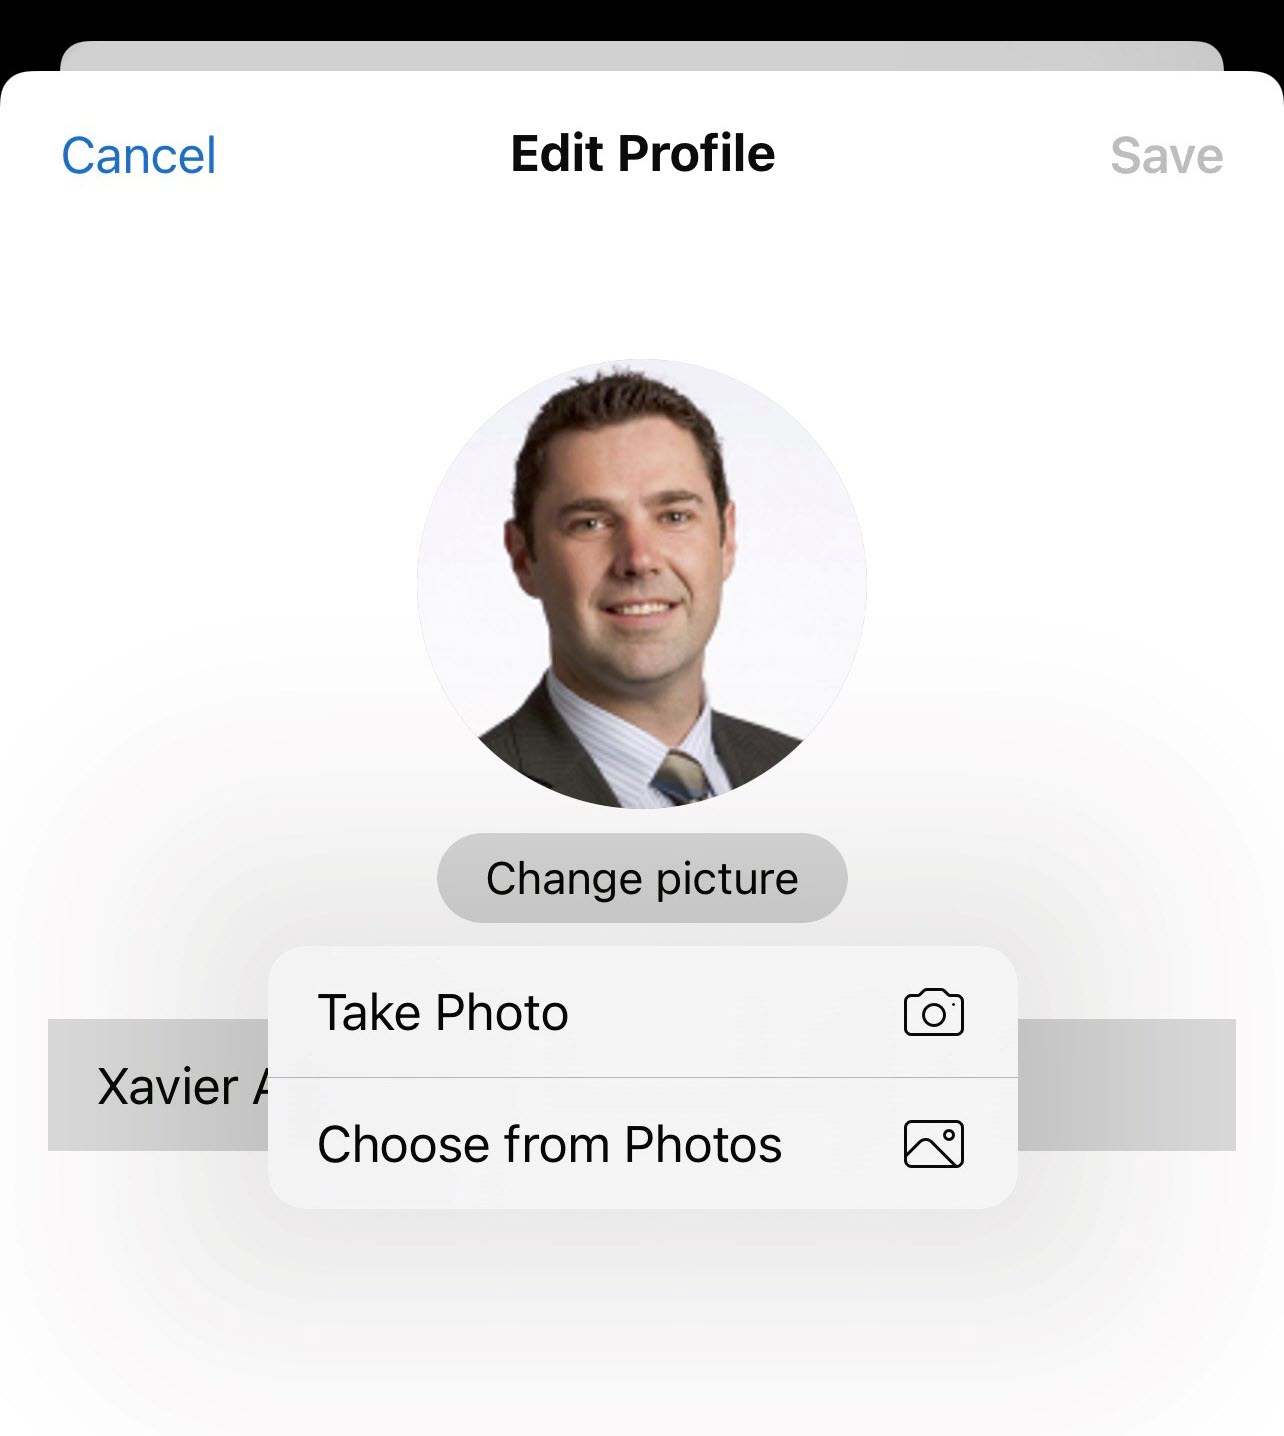
2. Tap your avatar, then edit or Change picture.
3. Either choose Take Photo or Choose from Photos.
5. Once complete, tap Save.
Update Your Display Name
You can change the name of your Webex profile to show your preferred name. To update your display name:
1. In the app header, tap your profile picture.
2. Tap on your Avatar.
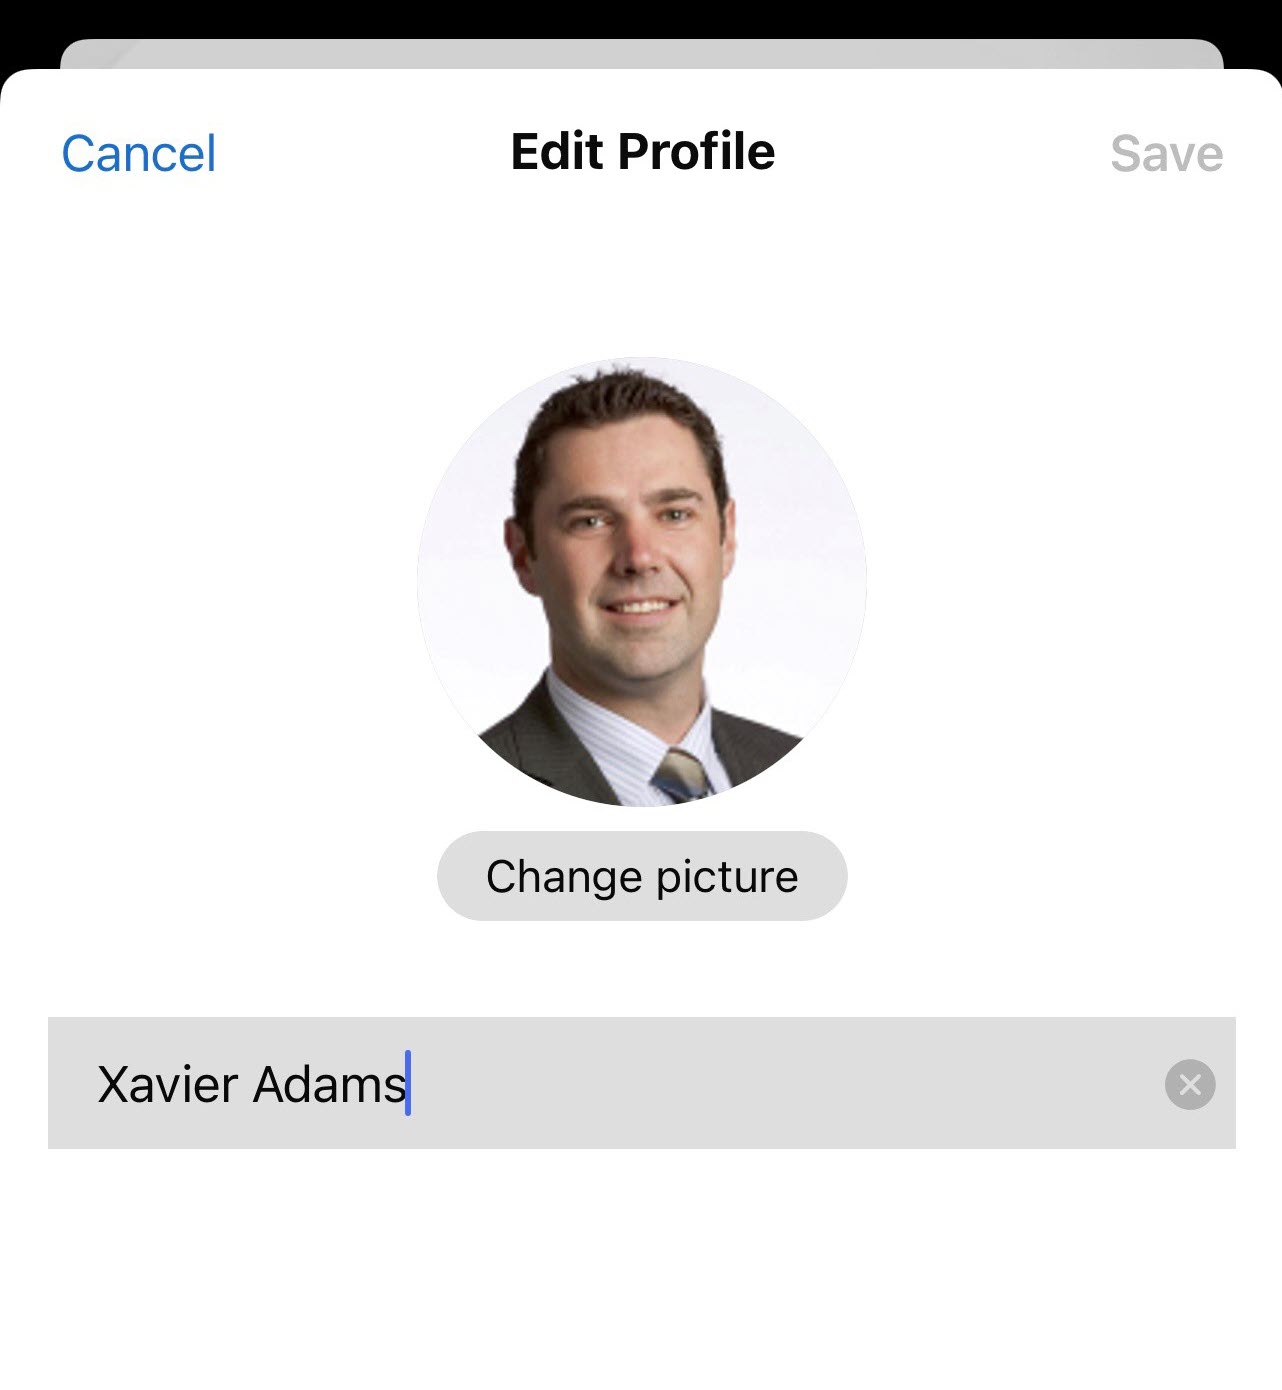
3. Tap your name.
4. Make your changes. Then, tap Save.
Set a Custom Status
Create and post the status you want so that your friends know what you're up to. To set a custom status:
1. In the app header, tap your profile picture.
2. Tap Set a Status.
3. Select a status from the list.
4. You can also create a new status, by typing into the What's your status? text field.
5. When finished, tap Done.
Note: You can add up to five status options to the list, so they are quickly available. Each status has a maximum length of 75 characters and can also include emojis.

Send and Receive Messages
Messages in Webex are where you chat with coworkers, exchanging content and ideas. You may send a message directly to a coworker or to a space you created. To send a message directly to a coworker:
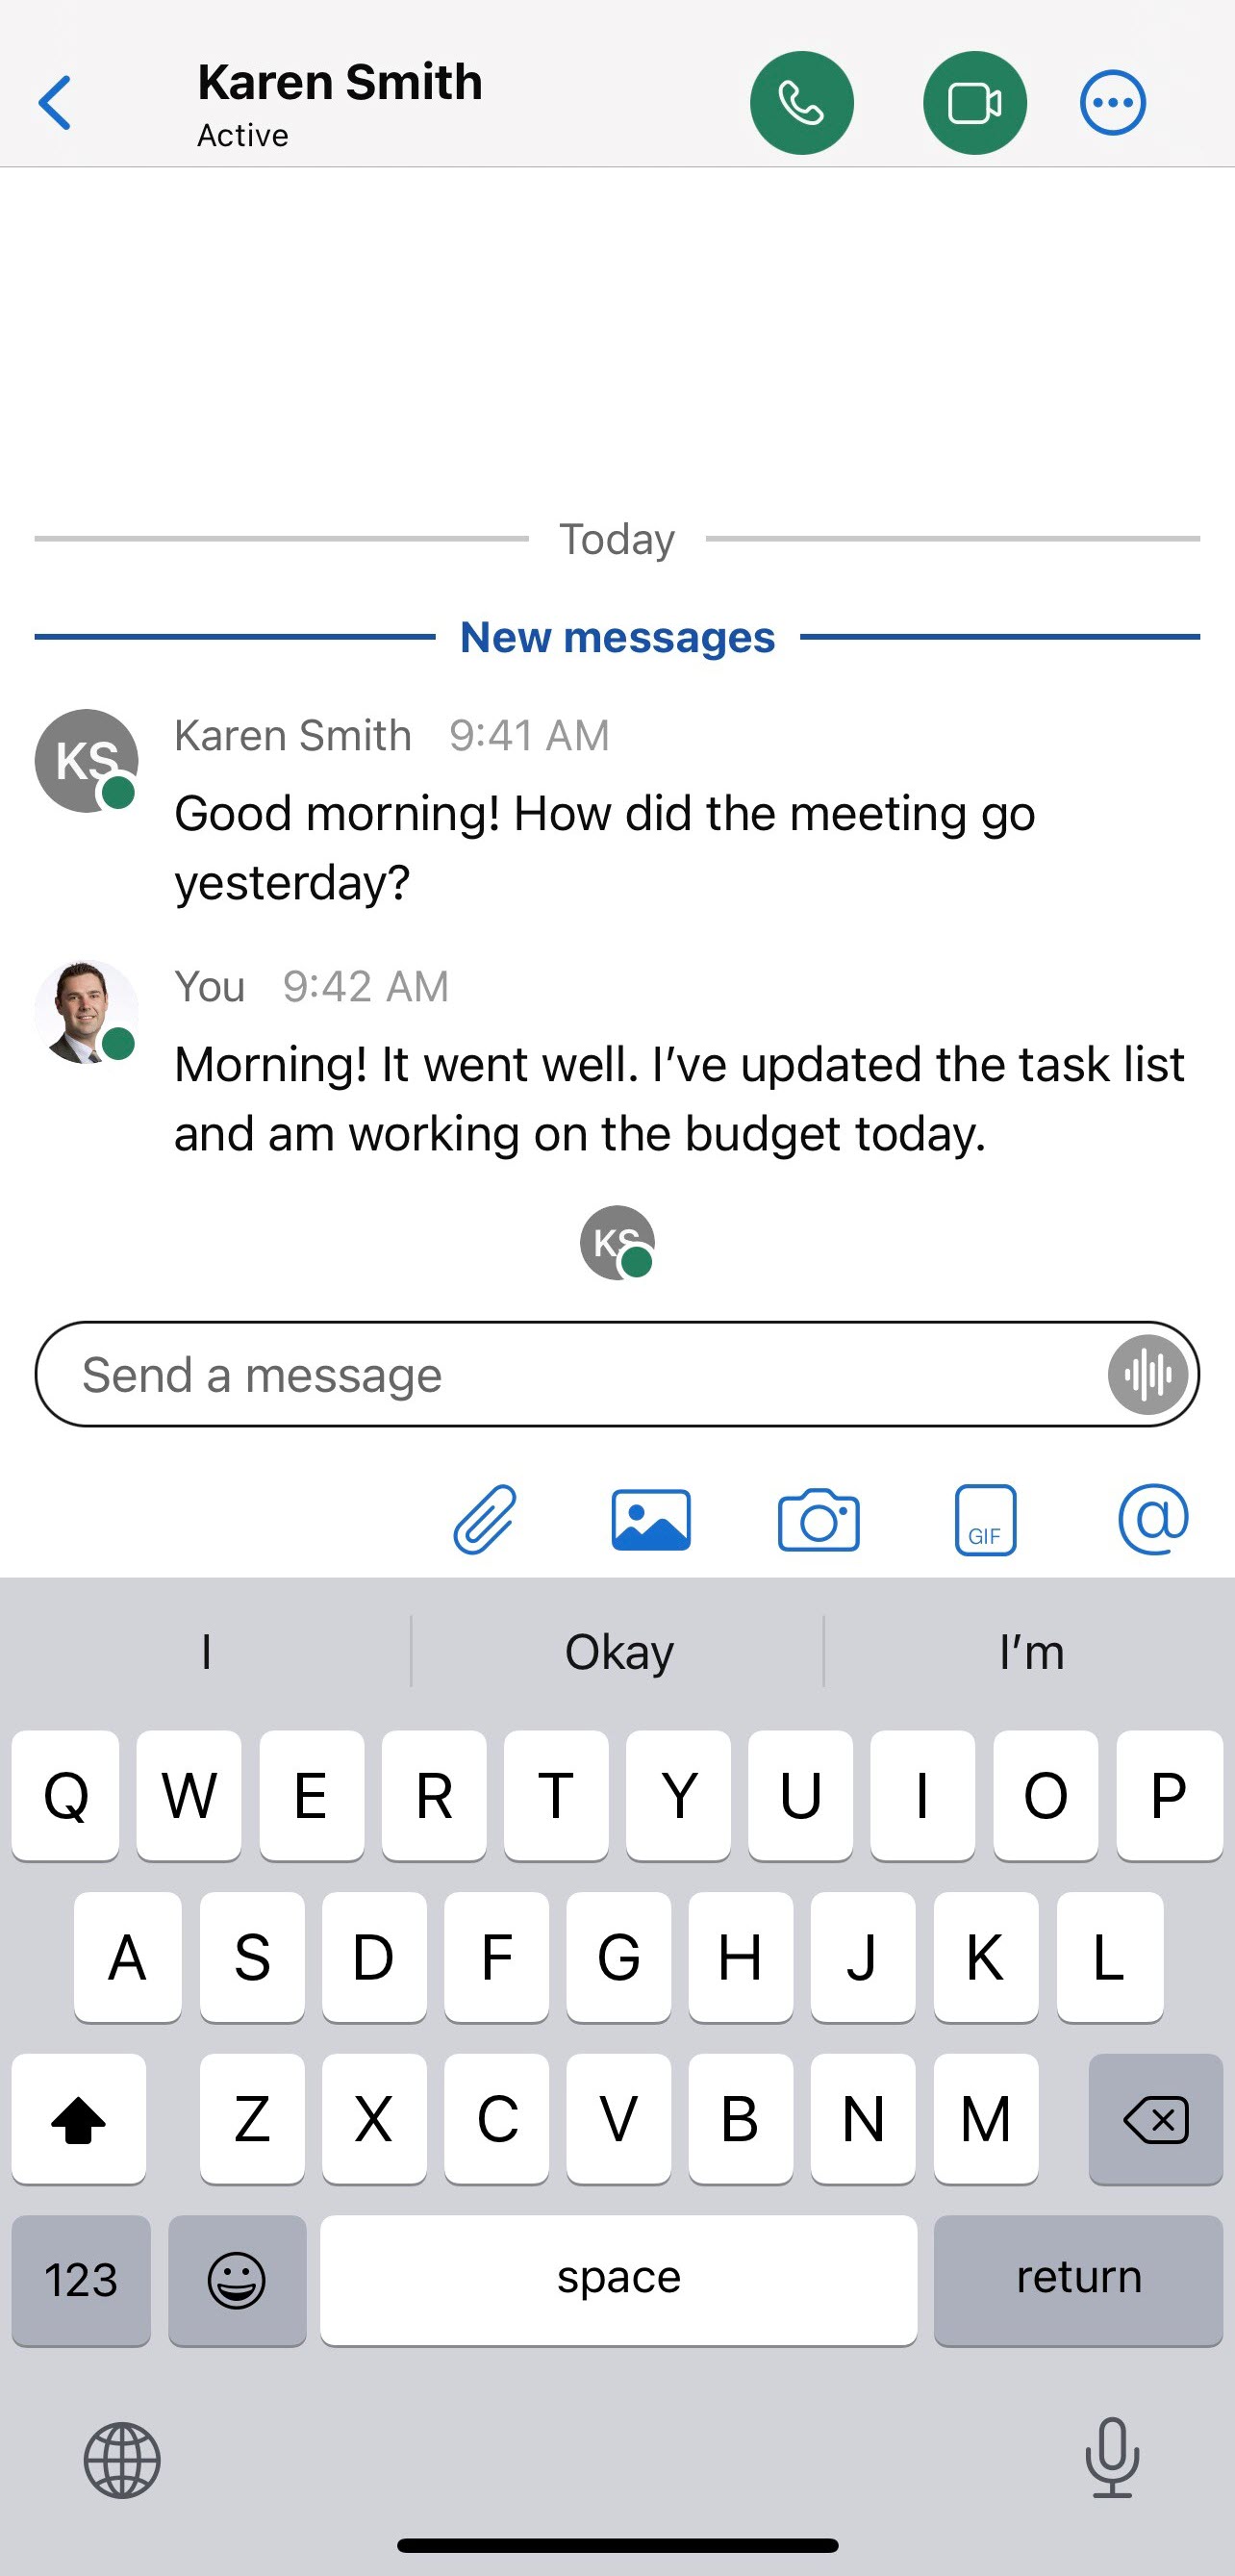
1. Select a person from your spaces list.
2. Tap in the message area and then type your message. You can include files, add personality with emojis or animated GIFs, and also add formatting or markdown to make your messages stand out or be easier to read.
3. Tap the Send icon to send your message.
Note: Don’t worry if you’ve made a mistake and need to edit it or if you’ve pasted in the wrong space and need to delete the message entirely.
Receive and Organize Messages
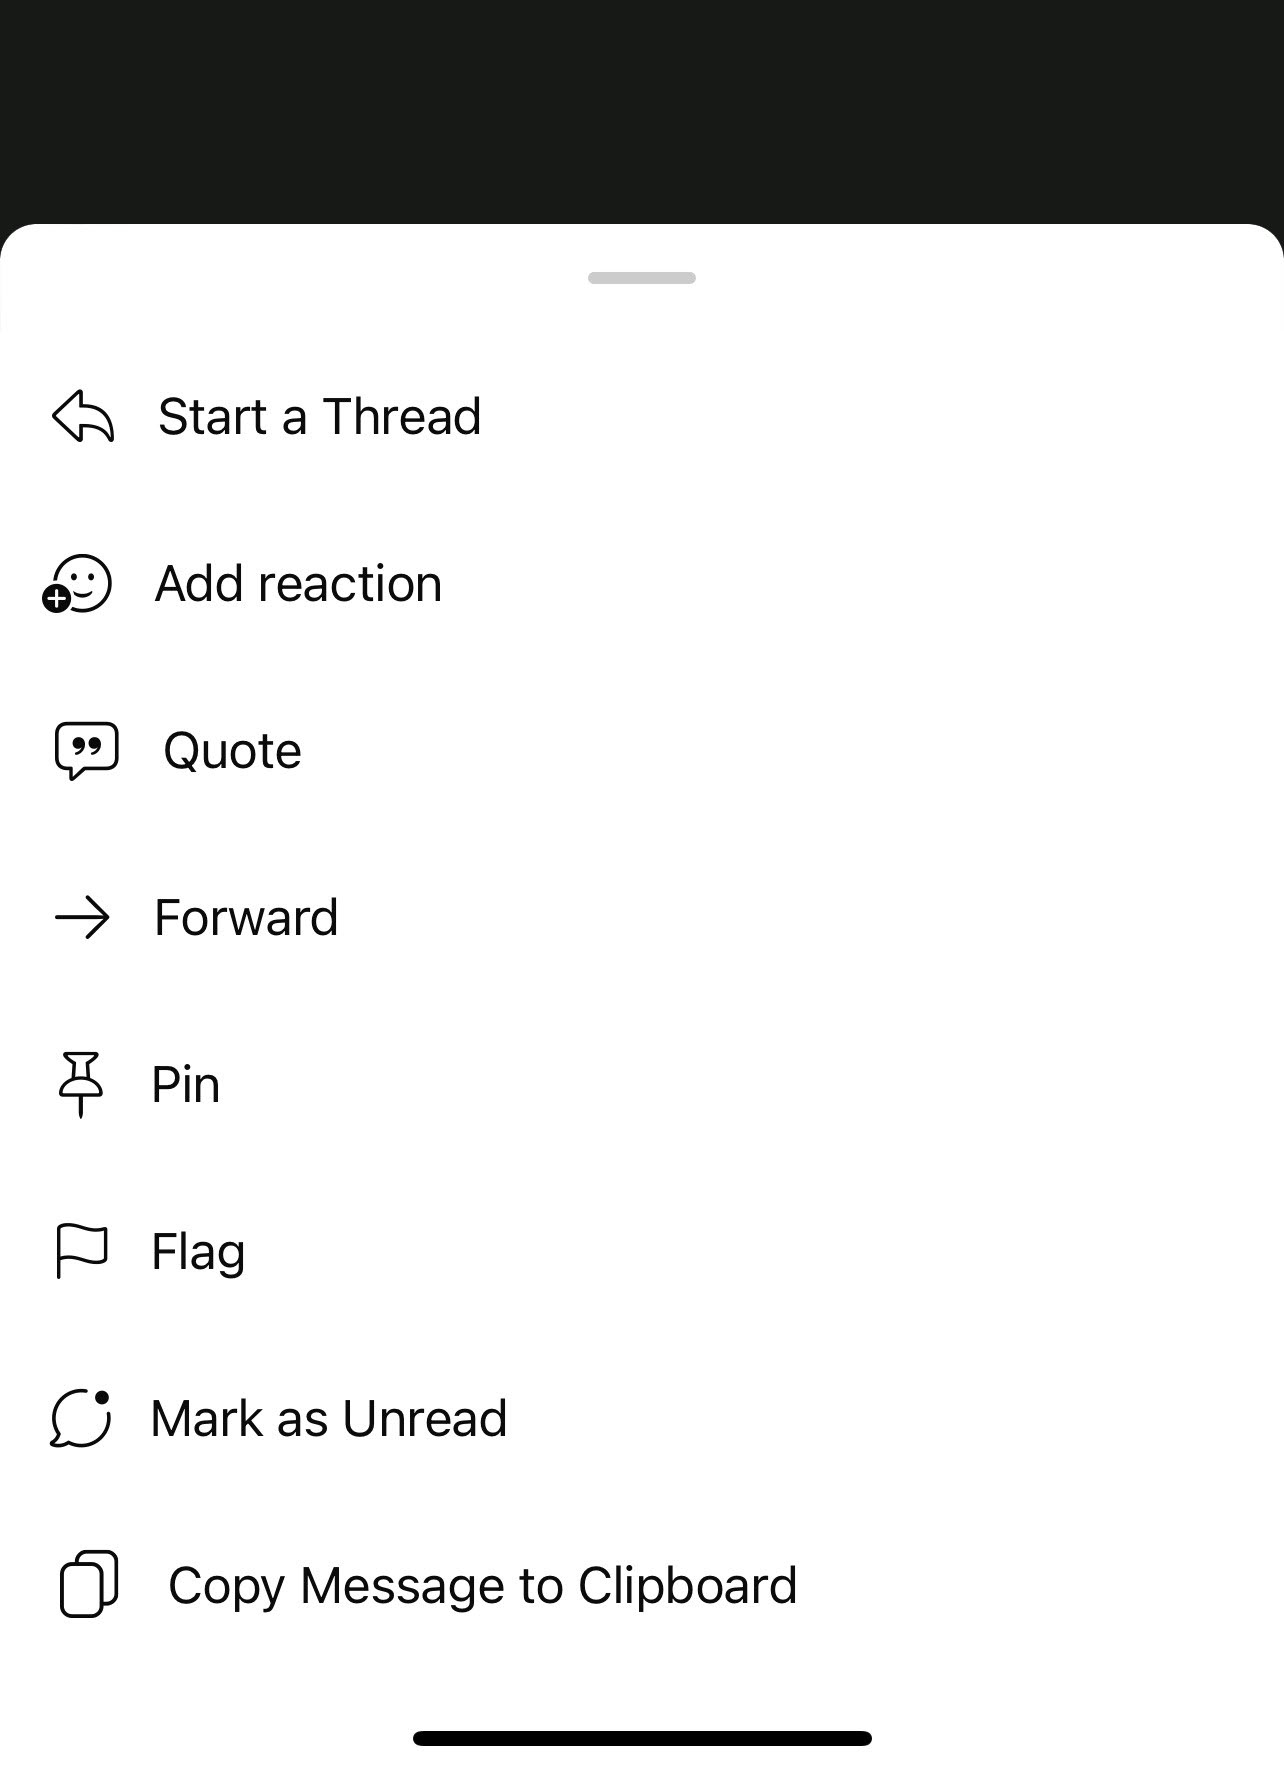
When you get a new message, you're notified right away. You can also make it easy for yourself and others to follow a specific train of thought using threading, quotes, and even forwarding a message to someone else. You can also flag important messages so that you can refer back to them easily.
To do any of these, long press on the message you'd like to edit, forward, flag, etc., and your options will appear.
Send a File
You can share most types of files, with the largest file size being 2 GB. You can also preview documents without downloading them first. Acceptable file types: : .doc, .docx, .gif, .jpeg, .pdf, .png, .ppt, .pptx, .xls, and .xlsx. To send a file:
1. Tap the Attachment icon.
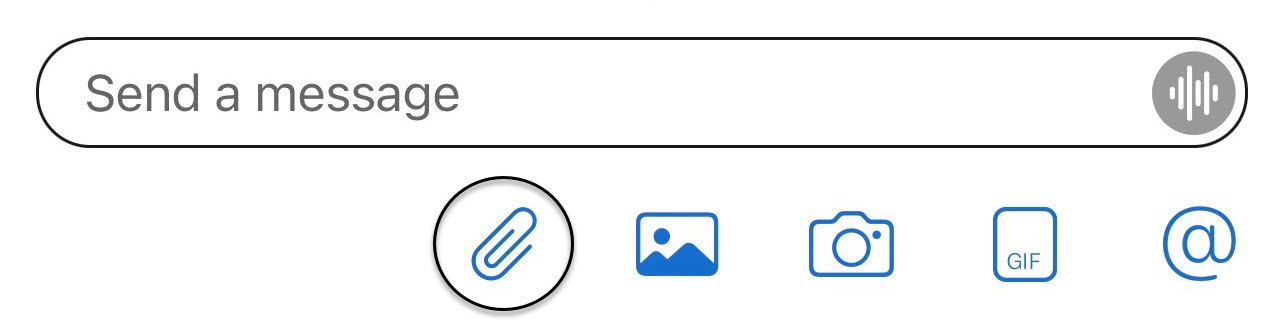
2. This brings up your system dialog, where you can select and upload a file.
3. Once uploaded, press the Send icon to send a file.
Place a Voice or Video call
With Webex, you can make audio or video calls. You can make a call in Webex from many different locations. Just look for the icons of the audio or video call options.
To make a call using the dial pad:
1. Tap the Calling tab in the navigation menu.
2. Then tap the Dialpad icon.
4. Enter a phone number in the dialpad.
5. Then choose whether you want to make it an Audio or Video call.

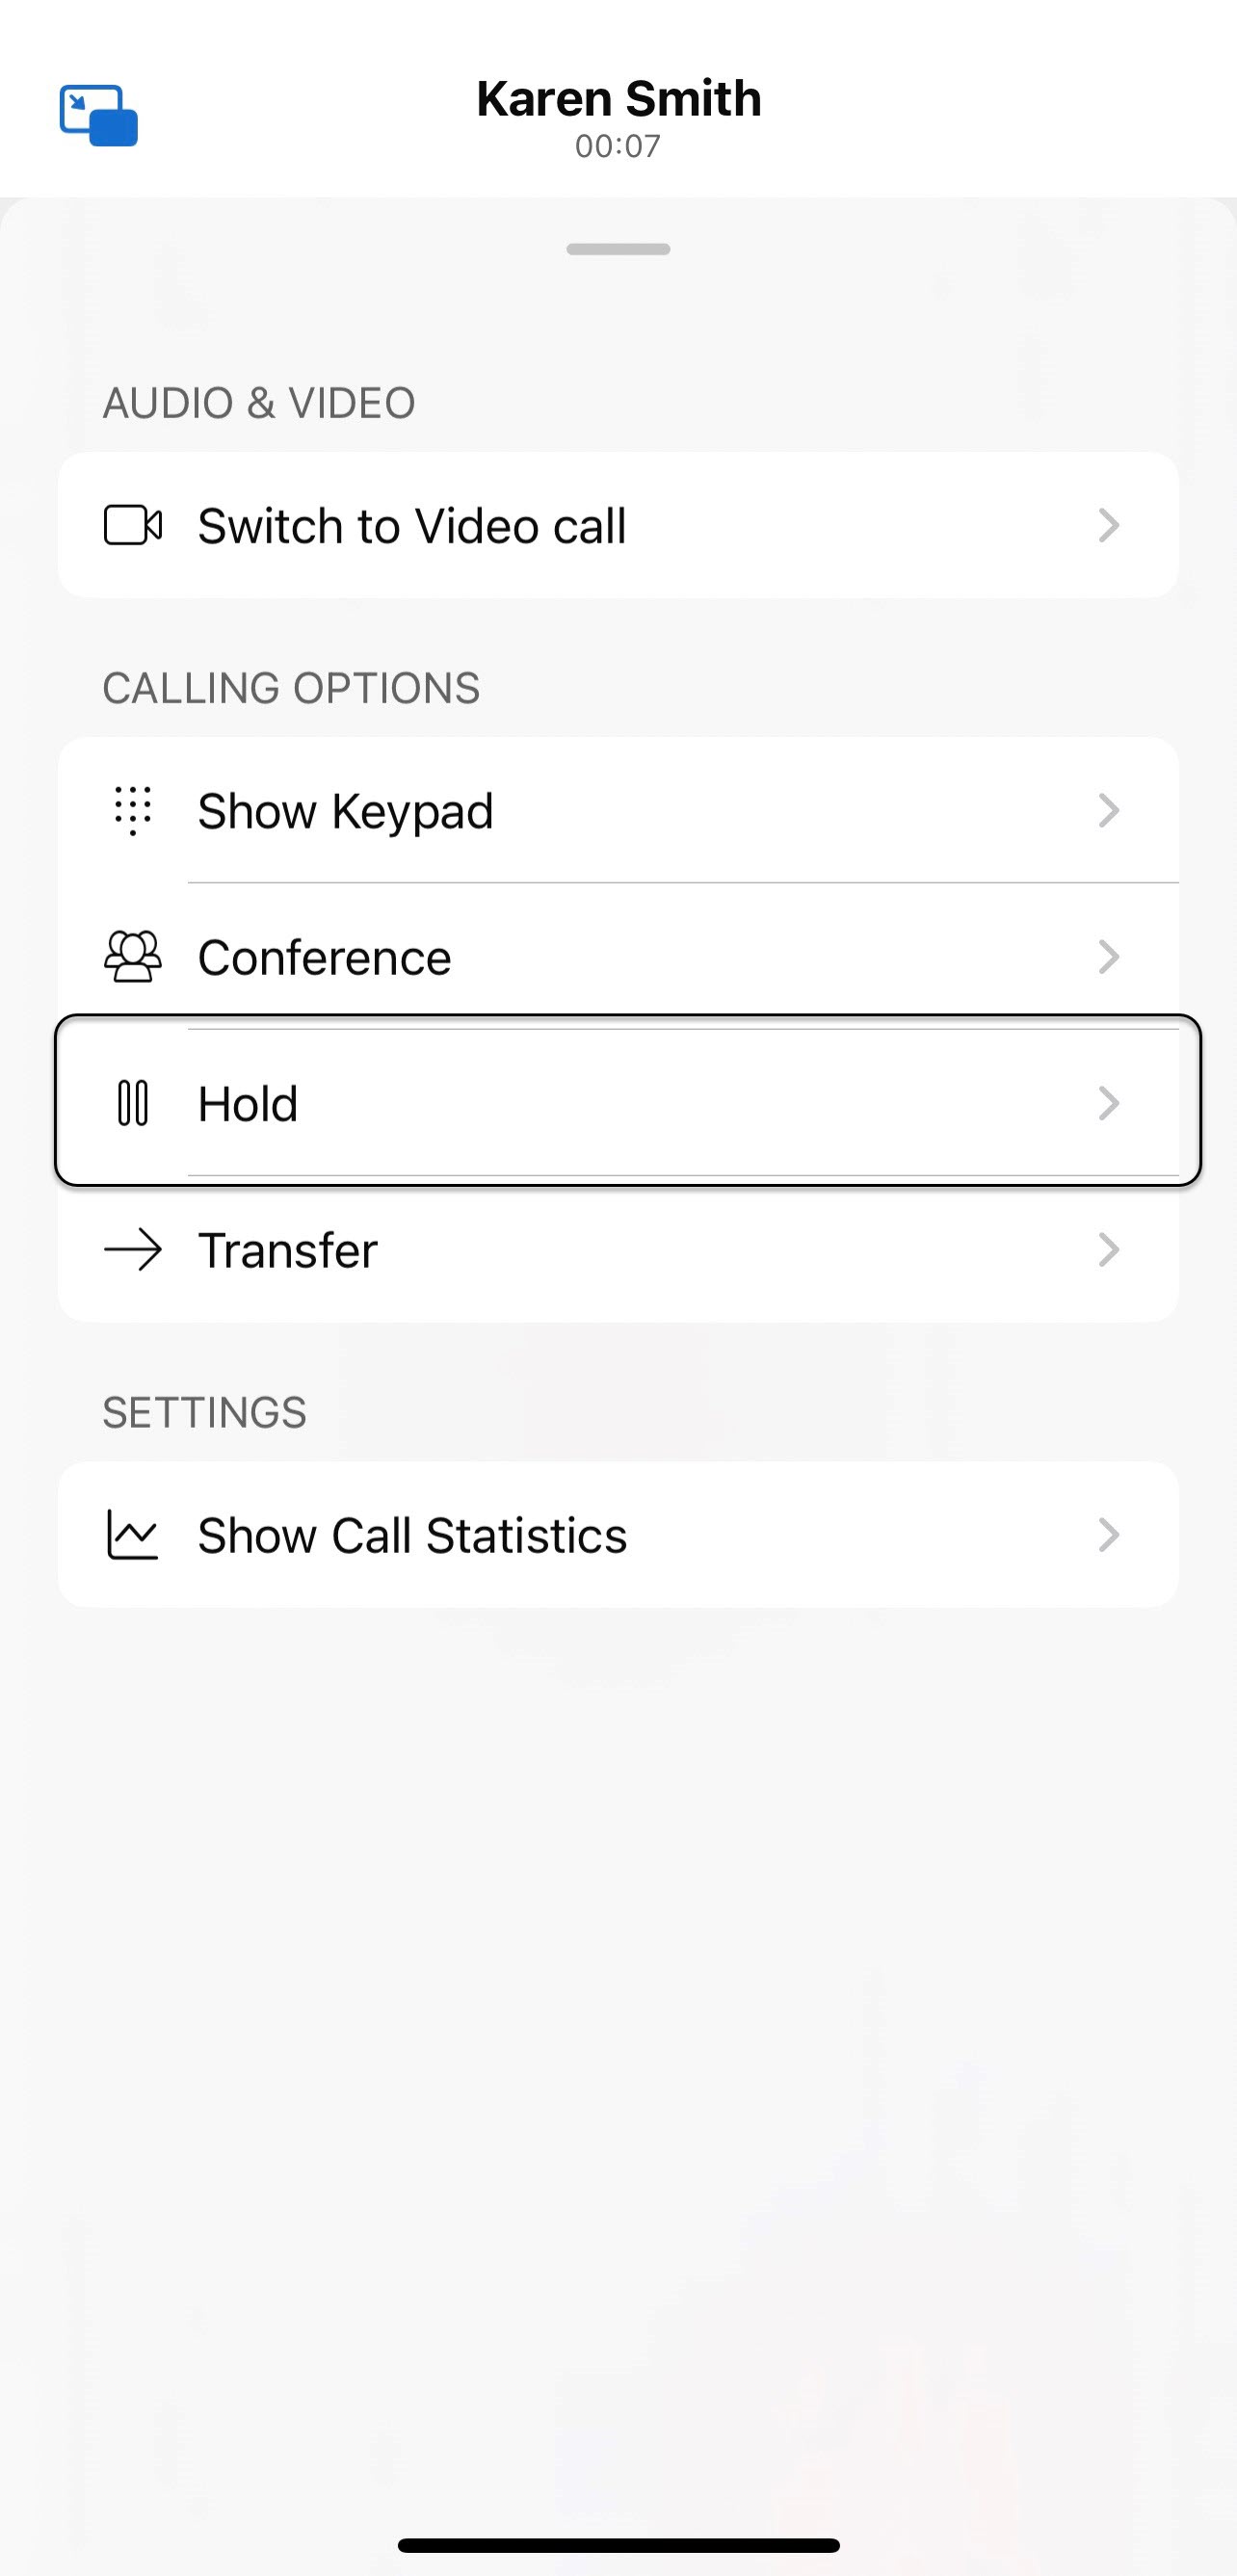
Place a Call on Hold
1. While on a phone call, select More.
2. Then select Hold.
3. After you put the call on hold, your spaces list shows that it's on hold.
To go back to your held call:
1. Select it from the spaces list.
2. Then select Resume.
Transfer a Call
If you are on an active call, you can perform a semi-attended or an attended transfer to another contact within the company directory or any other number you dial via the keypad.
1. While you're on a phone call, select More.
2. Then select Transfer.

3. Enter the number or the name of the person to whom you want to transfer the phone call.
4. Next, choose whether you want to make it an Audio or Video call. Your original phone call is put on hold.
5. Lastly, you can let the other person know why you're transferring the call to them by announcing the call upon answering and then hitting the Complete Transfer button.
or
6. You can complete a semi-attended transfer by hitting the Complete Transfer button as soon as it starts ringing.
Access Advanced Call Settings
Advanced call settings allow you to set additional preferences for your phone system.
1. In the app header, tap your profile picture.
2. Tap Settings.
3. Tap Calling.
4. Select Advanced Call Settings.

Incoming Calls
Incoming call options provide a quick way to set your incoming call preferences, normally configured via the portal, directly from the desktop client. If you are running the softphone app on multiple devices, settings you manage here will be applied to all of them.
Do Not Disturb
The Do Not Disturb setting will send all incoming calls to voicemail and not ring on your devices. To enable, tap the Do Not Disturb toggle.
Note: Enabling this feature can affect other group call routing features that you may be a part of like a call center or call queue; however, we recommend that if you are a part of these, that you manage your Do Not Disturb and available status within those environments.
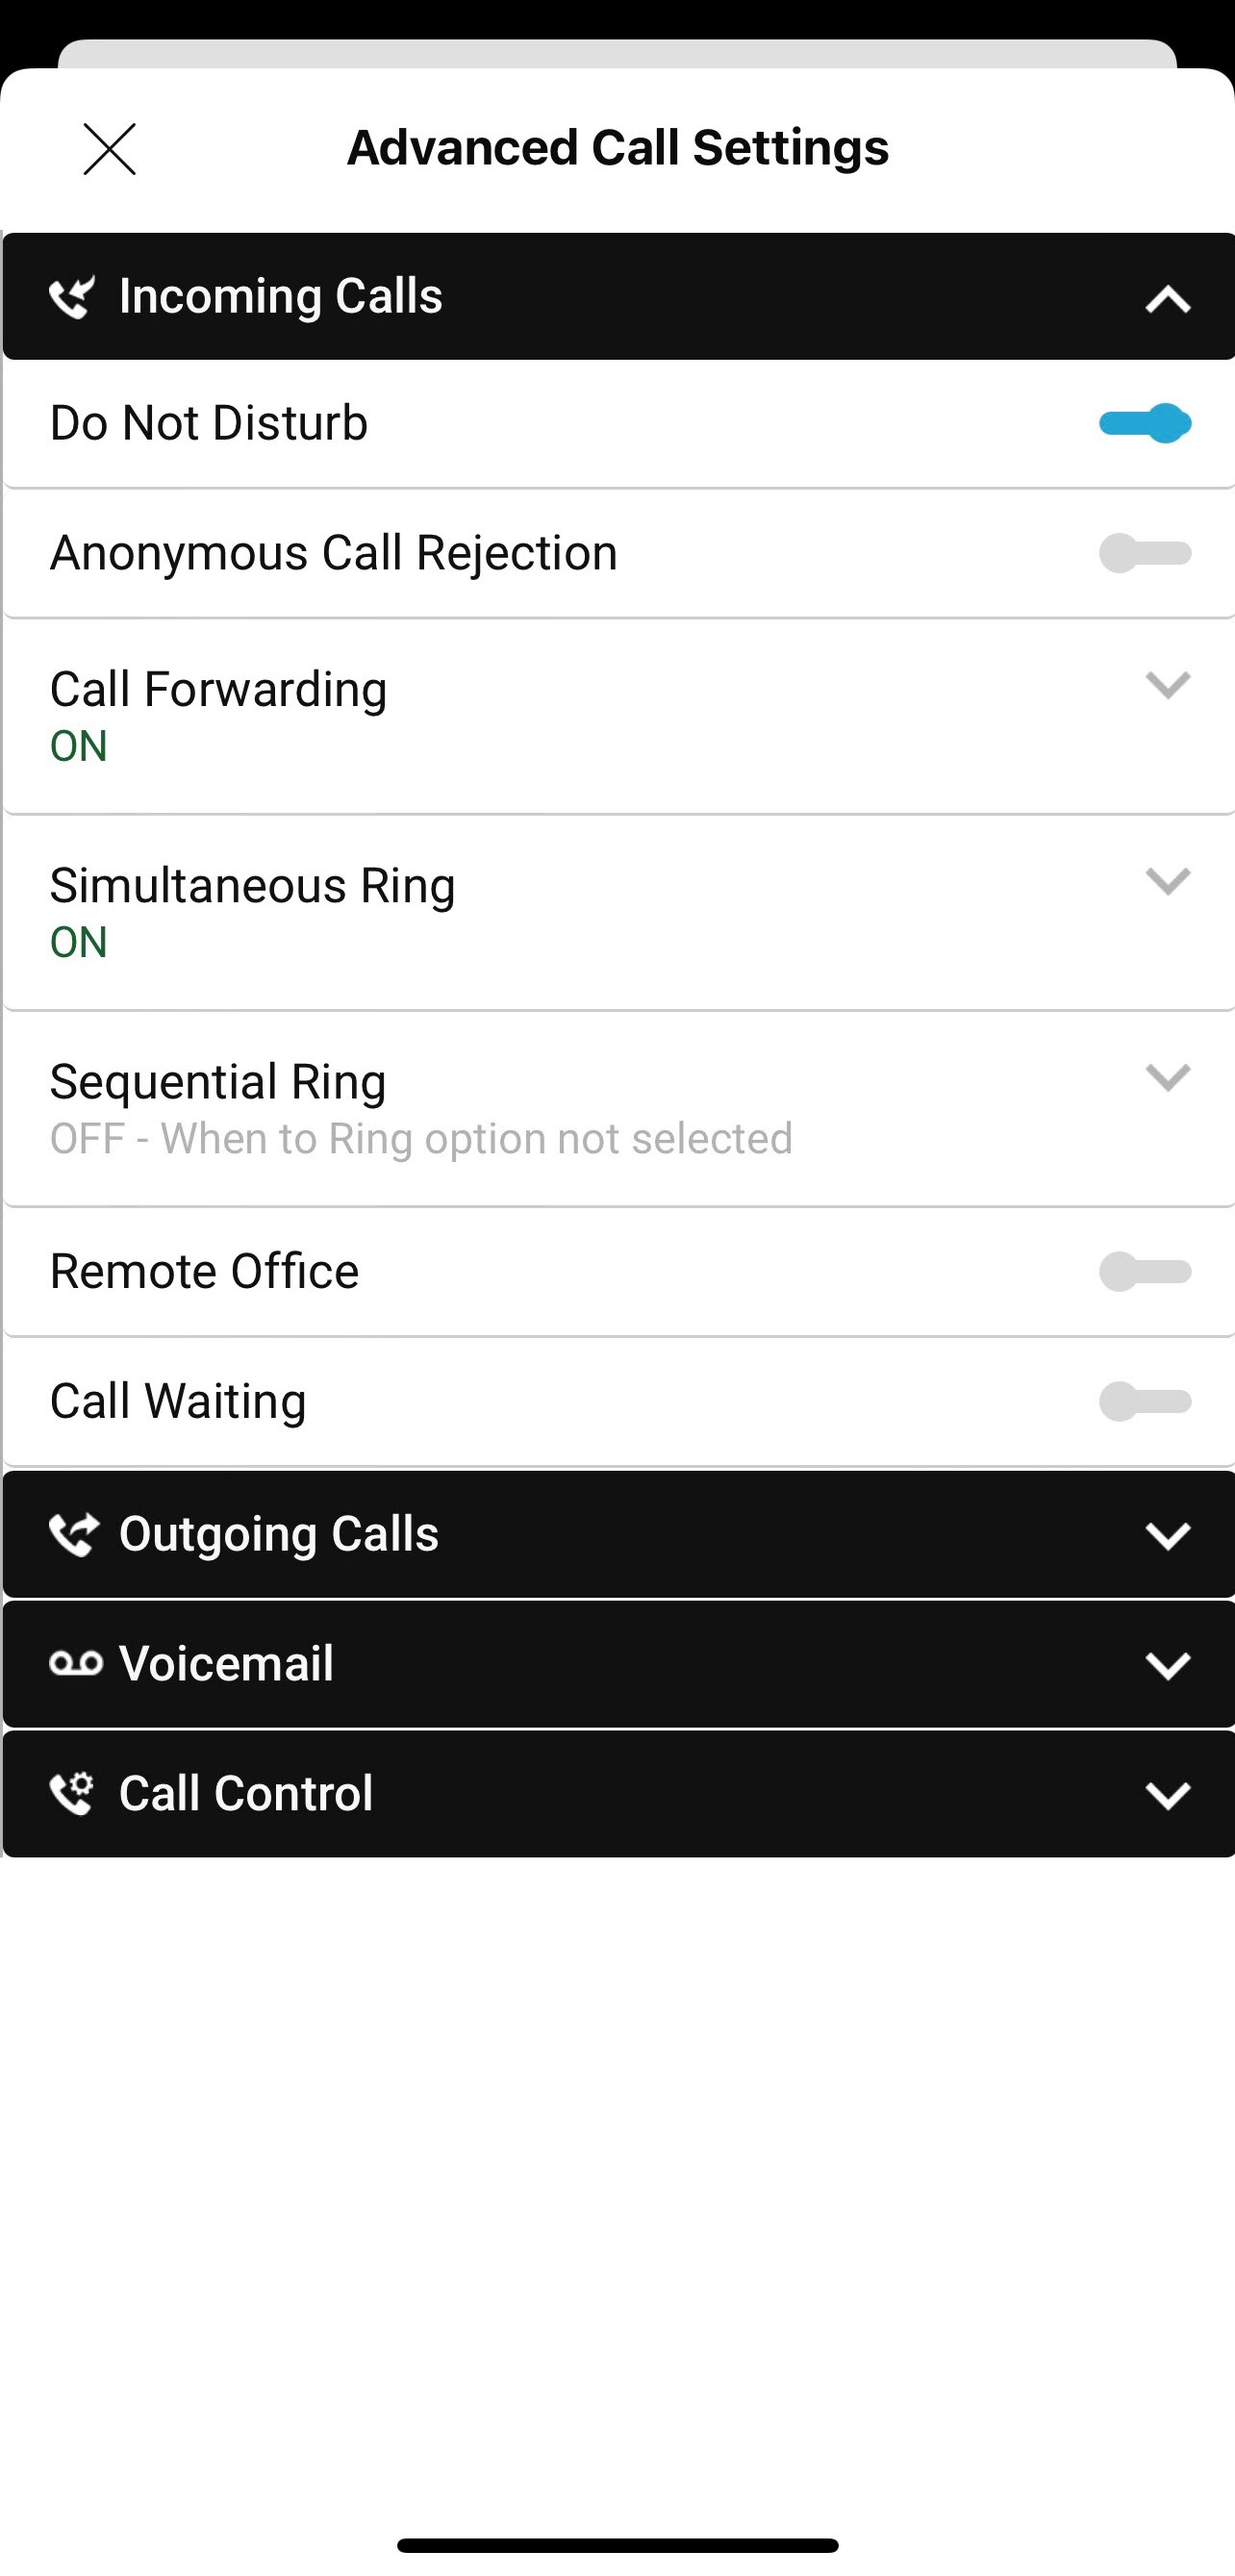
Anonymous Call Rejection
Anonymous Call Rejection allows you to reject calls that have a blocked caller ID attached. When activated, all anonymous calls are instantly rejected, preventing the caller from even leaving a message. The default setting for this feature is off. To enable, expand Incoming Calls and select the toggle next to Anonymous Call Rejection.
Call Forwarding
Call forwarding allows you to forward calls to the desired number instead of your voicemail. Call forwarding options include: always, when busy, when no answer, and when not reachable. If you have not enabled a call forward service here, then calls will automatically forward to voicemail. To start, expand this area by clicking the chevron button.
The Always option forwards all incoming calls to the specified destination and has the highest service precedence. It will override all other forwarding and mobility settings. To enable, select the toggle and enter the number to forward calls to.
The When Busy option forwards incoming calls only when you have call waiting disabled and are currently on another call or have Do Not Disturb on. To enable, select the toggle and enter the number to forward calls to.
The When No Answer option forwards incoming calls only when you are away or not answering calls. To enable, select the toggle and enter the number to forward calls. You may also designate the number of rings before being forwarded. Tap the drop-down menu to designate the number of rings.
The When Not Reachable option automatically forwards all incoming calls to a different phone number, but only when all of your devices are offline and not connected to the network. To enable, select the toggle and enter the number to forward calls to.

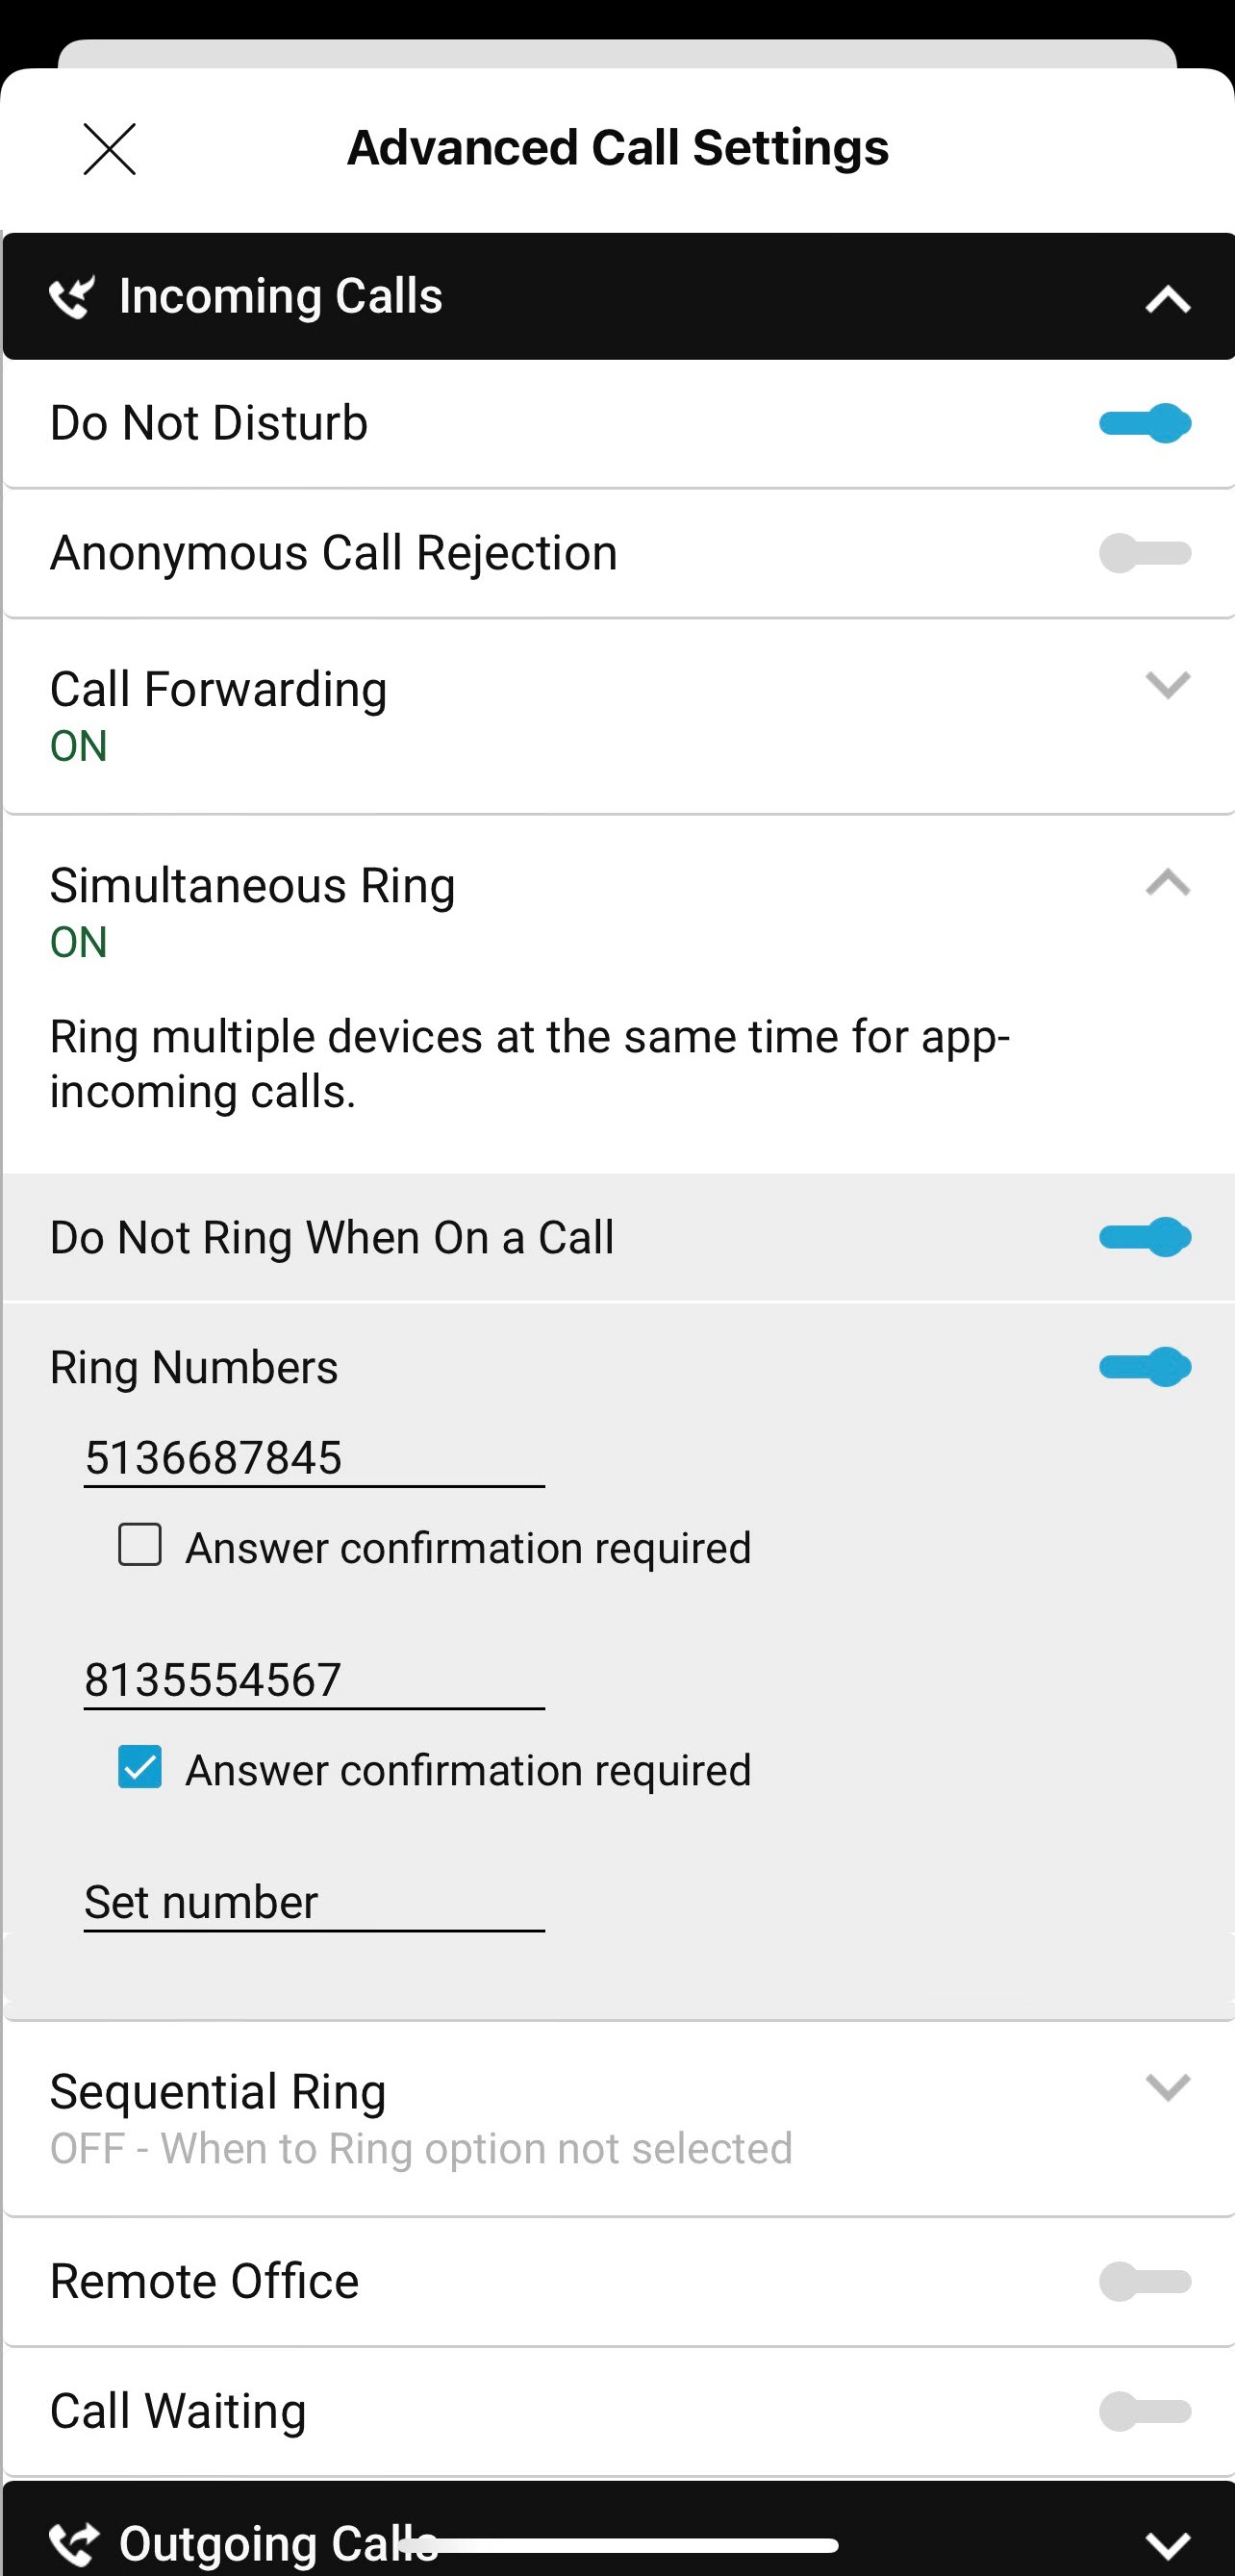
Simultaneous Ring
Simultaneous ring allows you to add phone numbers of other devices that you would like to ring at the same time as your primary phone, when you receive a call. You can have up to 10 simultaneous ring numbers at one time. To enable, expand this area and select the toggle next to Ring Numbers. Enter a number in the Set number field and hit Enter. If you'd like for simultaneous ring to only occur when you're not on a call, select the toggle next to Do Not Ring When On a Call.
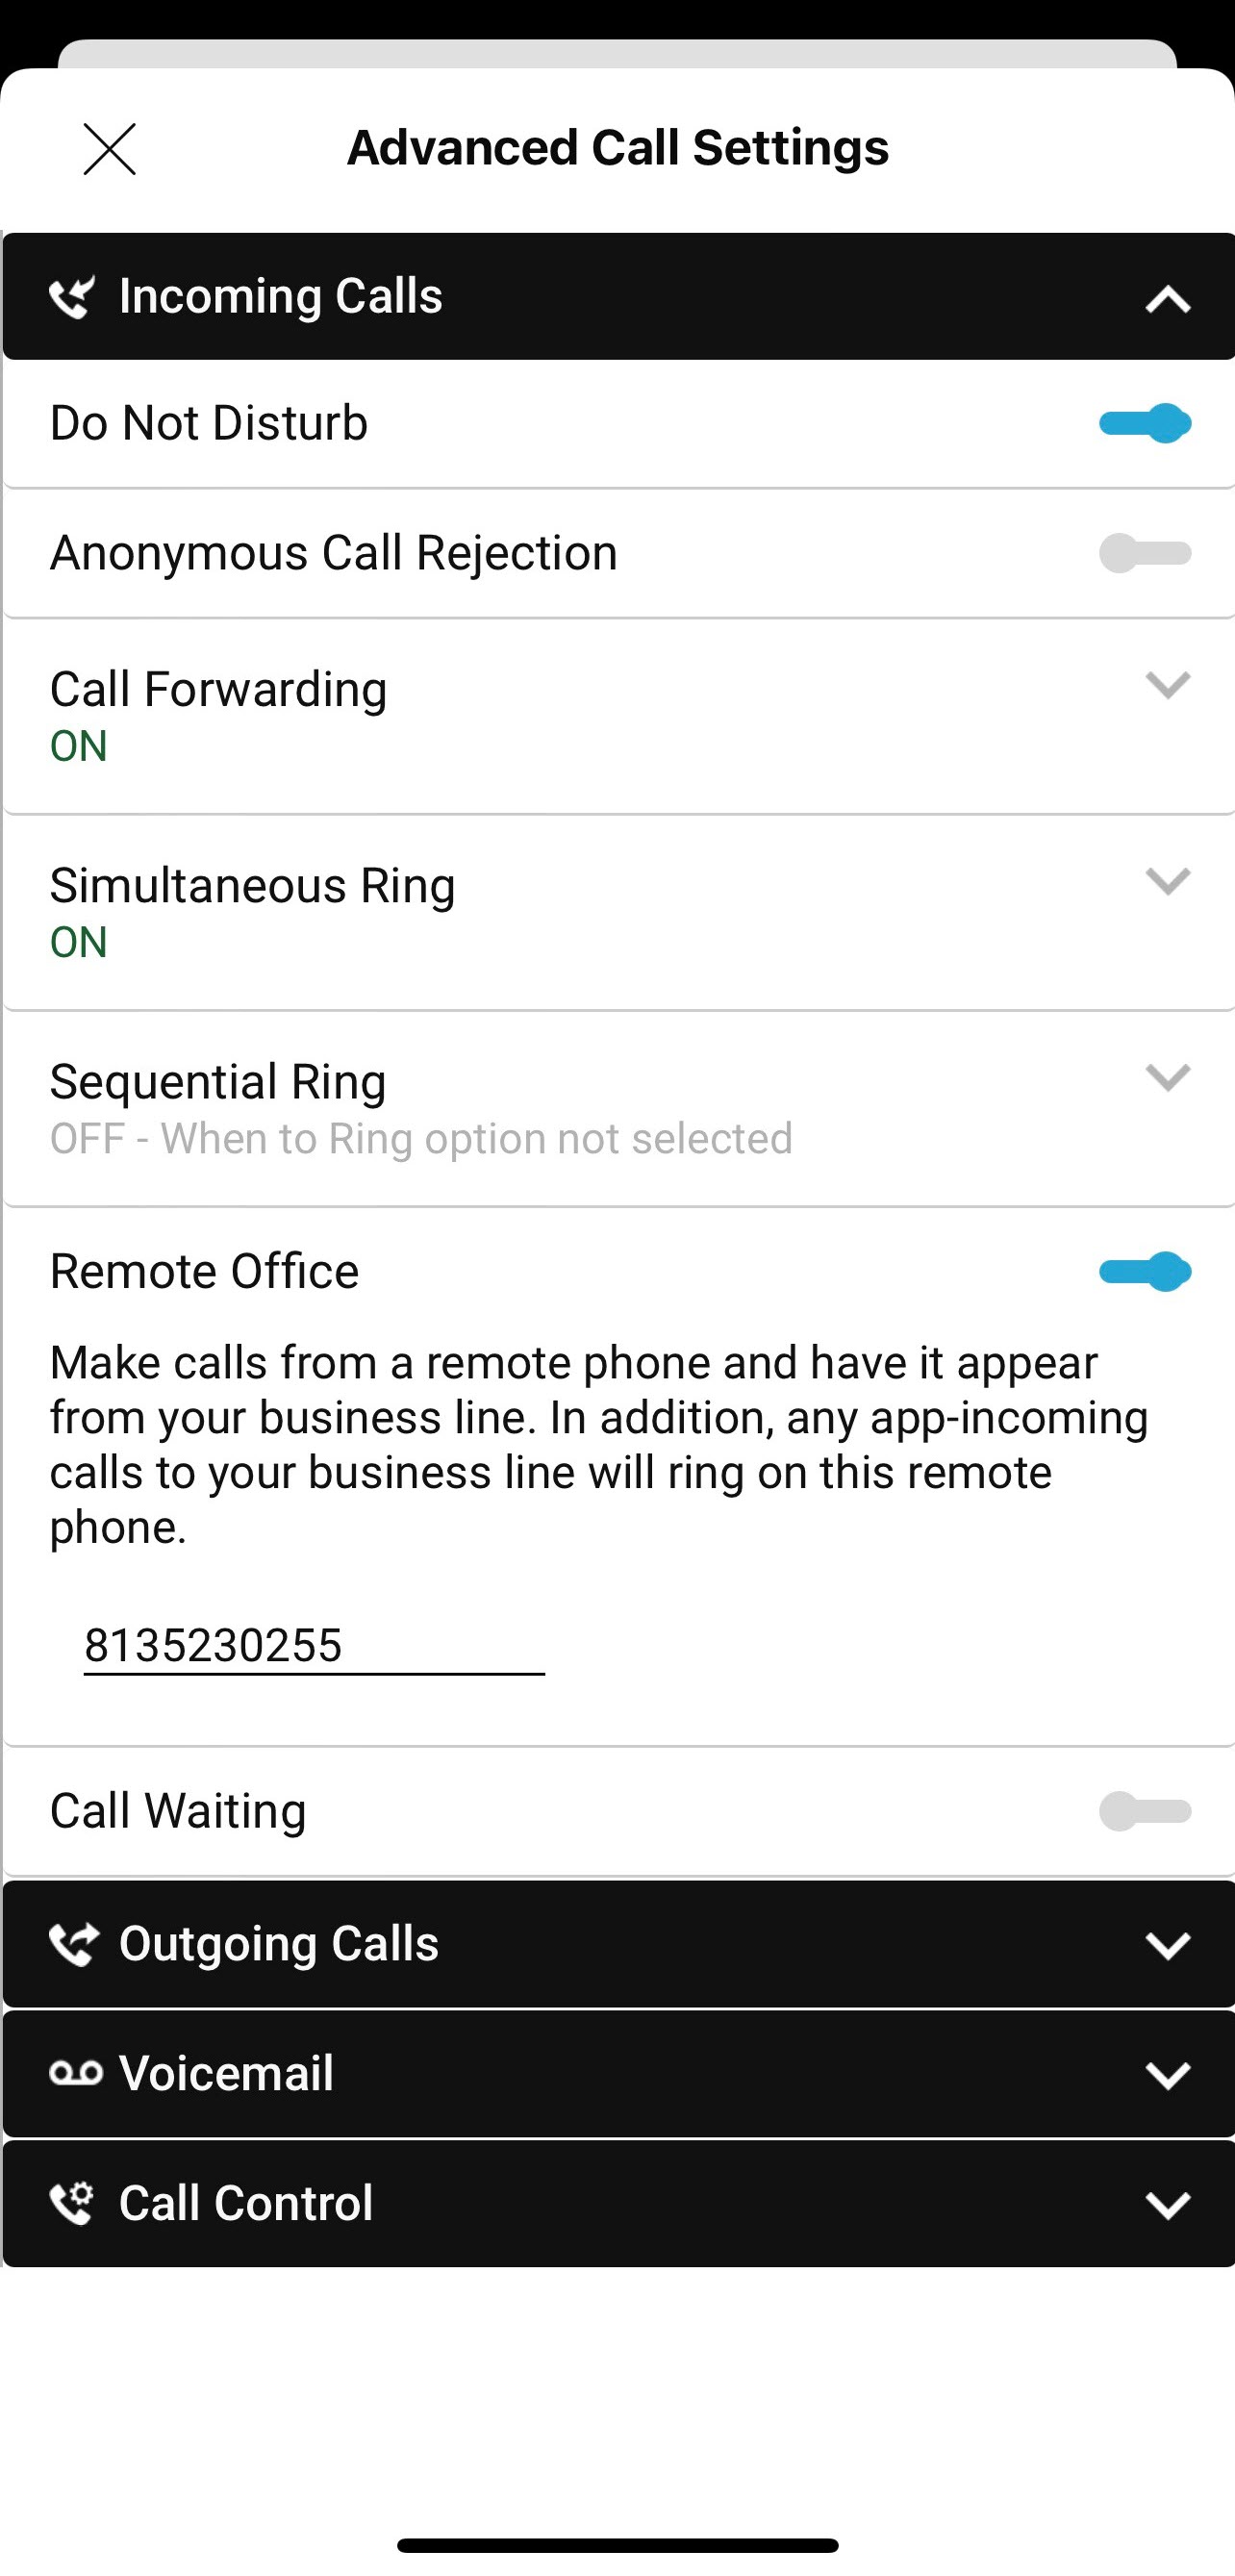
Remote Office
Remote office allows you to use your home phone, mobile phone, or other device as your business phone. Calls made from this remote phone using click to dial, are billed to your business, and all calls that come to your business phone ring the remote office phone. To enable this feature, select the toggle. Then, enter the number of the phone you wish to use as your remote office phone in the textbox.
Call Waiting
Call waiting provides multiple instances of the same line so while you are on the phone, it will still ring for the next incoming caller, and you can put the first caller on hold to answer it. It gives you the advantages of having multiple lines but on a single line phone. To enable, expand Incoming Calls and select the toggle next to Call Waiting.
Outgoing Call Settings
In the Outgoing Calls options, you can modify the following features:
Block My Caller ID blocks your phone number when calling other parties or contacts. The Block My Caller ID feature only blocks the Caller ID to external parties. Other people in your company directory will still be able to see the Caller ID. To enable, expand Outgoing Calls and select the toggle next to Block My Caller ID.
Automatic Callback allows you to monitor a busy caller in your group and automatically establish a call to that person when they are no longer busy. For example, if you have been trying to reach someone in your office, but they’ve been on the phone all day, you can either continue to try and call or you can activate Automatic Call Back. Once you’ve activated the feature simply call the party you are trying to reach. If you hear a busy signal, hang up. When the person you are trying to reach is available, your phone will ring with a distinctive sound. This notifies you when they are available. The moment they hang up, your call is established. To enable, expand Outgoing Calls and select the toggle next to Automatic Callback.

Start a Meeting
Webex offers a variety of collaboration options. But when should you use a Webex Personal Room meeting, a standard scheduled meeting, or a space meeting? Use this article to learn more about each one and determine when you want to use what.
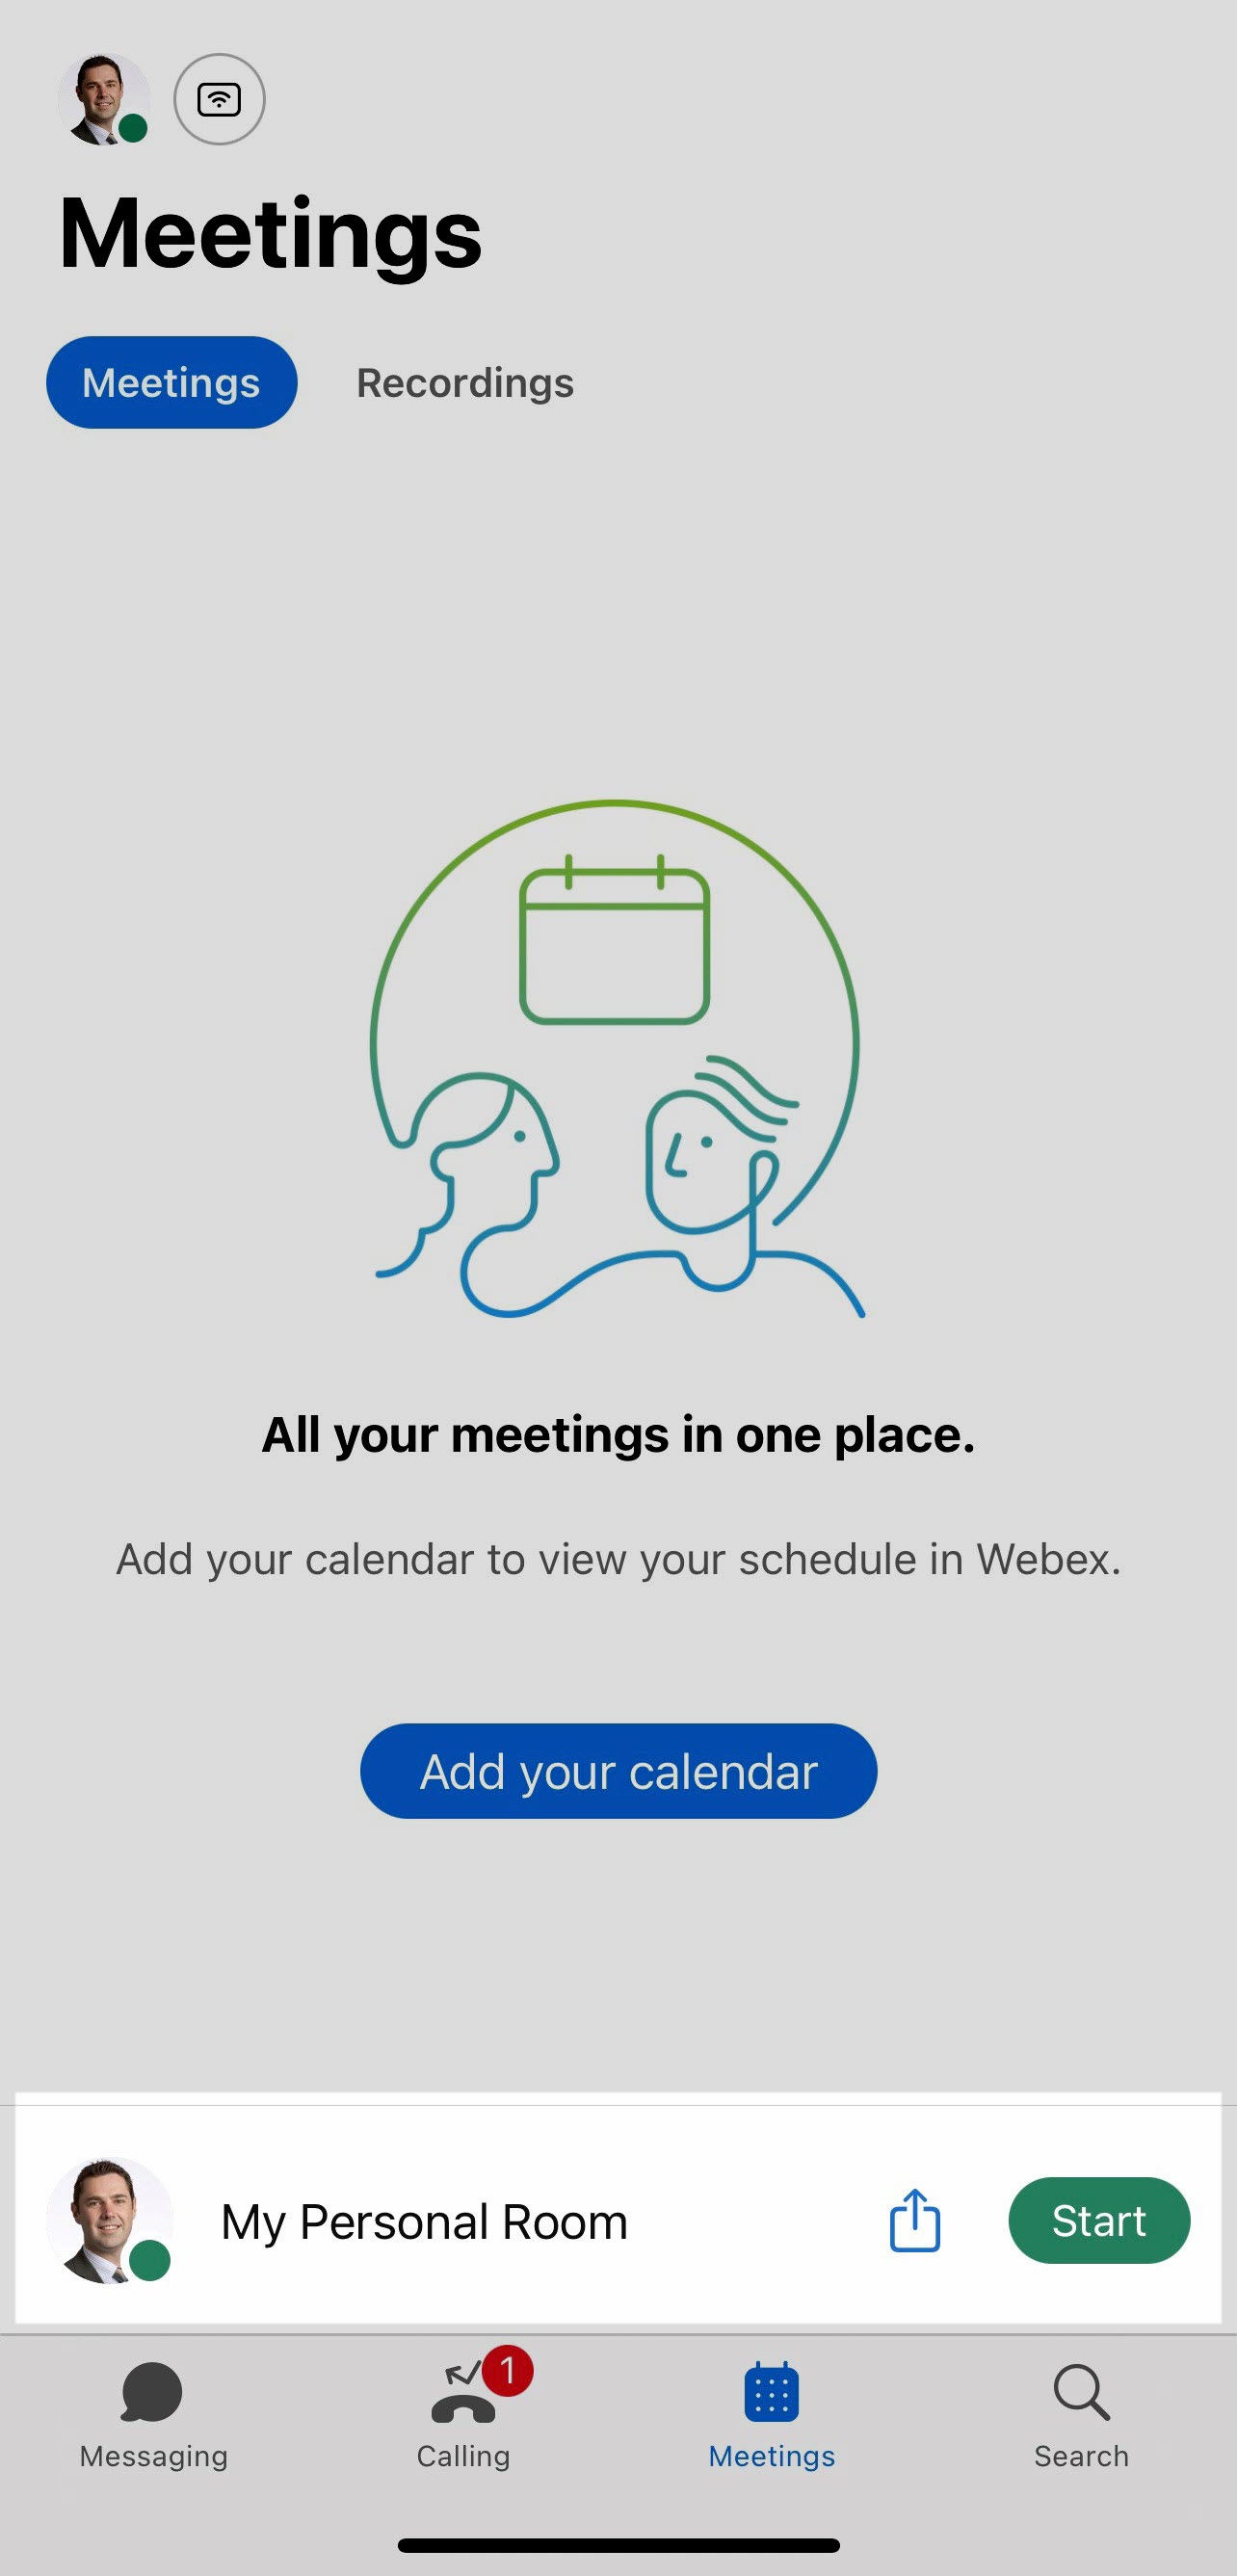
Start a Personal Room Meeting
You can meet in your Webex Personal Room by inviting people to join the same permanent, unique Personal Room link. A Personal Room Meeting is ideal for impromptu meetings, and back-to-back meetings in which the meeting host wants to remain in one meeting room for several meetings and have attendees join at different times.
Note: This option requires a specific license. If you do not see this option, you can contact your administrator for more information.
1. Go to the Meetings tab.
2. Choose Start.
Start a Meeting from a Space
If a space has more than 3 people but less than 75, you can start an instant meeting directly from that space. The number of people who can join the meeting varies for each space, depending on the Webex licenses of people in that space.
1. From the space where you would like to initiate a meeting, select Meet.
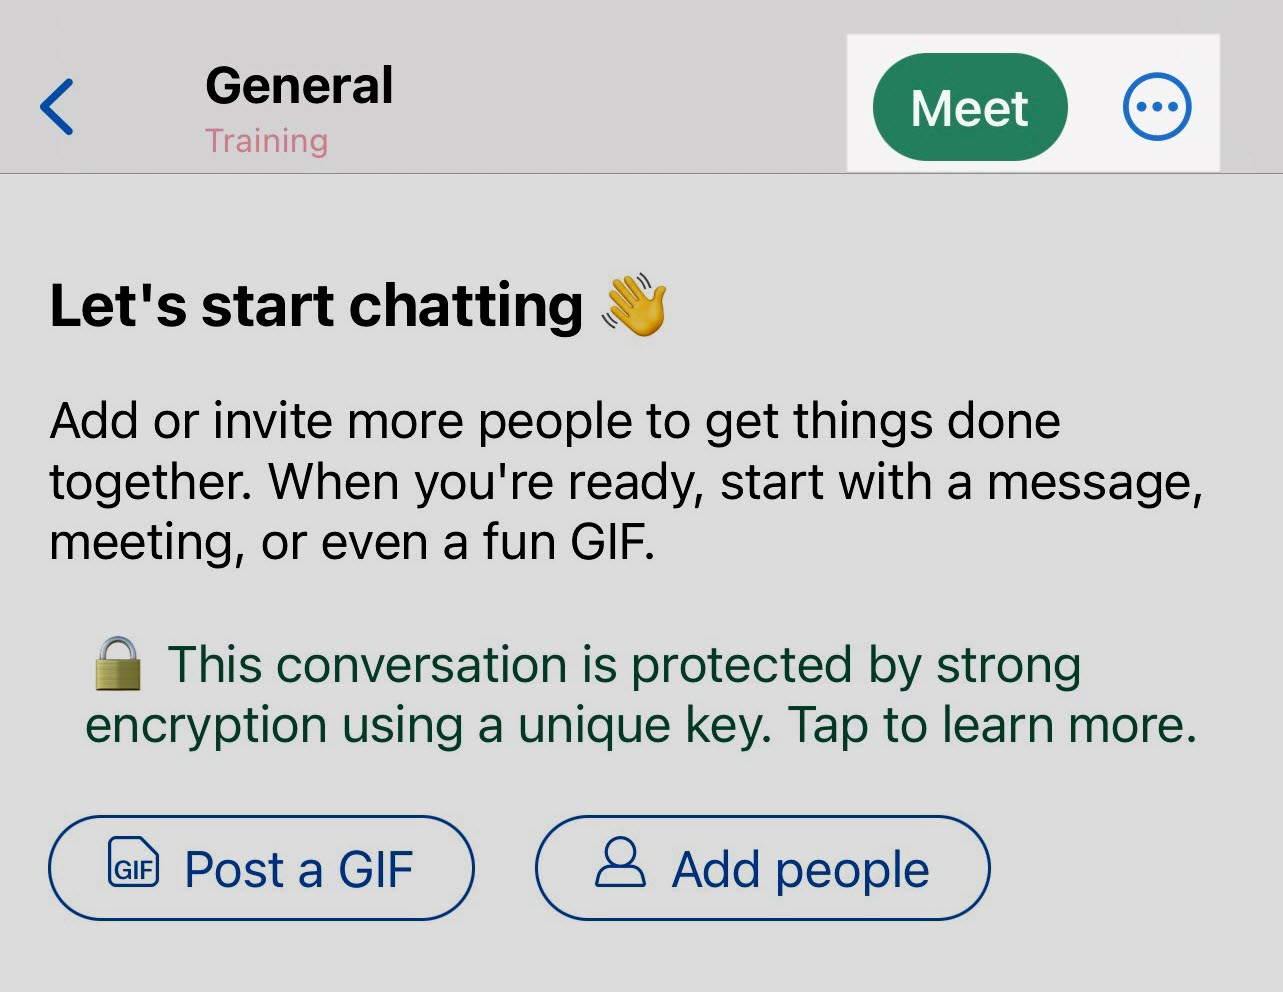
2. The meeting starts instantly, and everyone in the space sees a Join button in their meeting list and in their spaces list in the Webex app.
Join a Meeting
You can join a meeting from your computer, mobile device, phone, or a video system. To join a meeting:
1. Open your email invite.
2. Click Join.
3. If this is the first time you're joining a Webex meeting, Webex automatically downloads the app.
Note: If you don't want to install anything, click Join from your browser
4. Enter your name and email address. Proceed to click Next.
5. If you're asked for a meeting password, enter the meeting password that was a part of the initial email. Then, click Next.
6. In the preview window, you can make sure your audio and video sound and look good before you join the meeting.
7. Choose whether or not you want to have your video and microphone turned on before you join.
8. When ready, click Join Meeting.
Join a Meeting from Your Spaces List
The join button appears 5 minutes before the scheduled start time. At the scheduled start time, the label changes to inform you that the meeting is starting now. When someone else joins the meeting, the countdown appears on the button and you can see how many people have already joined.
1. Go to Messaging.
2. Click the green button beside the space or meeting name.
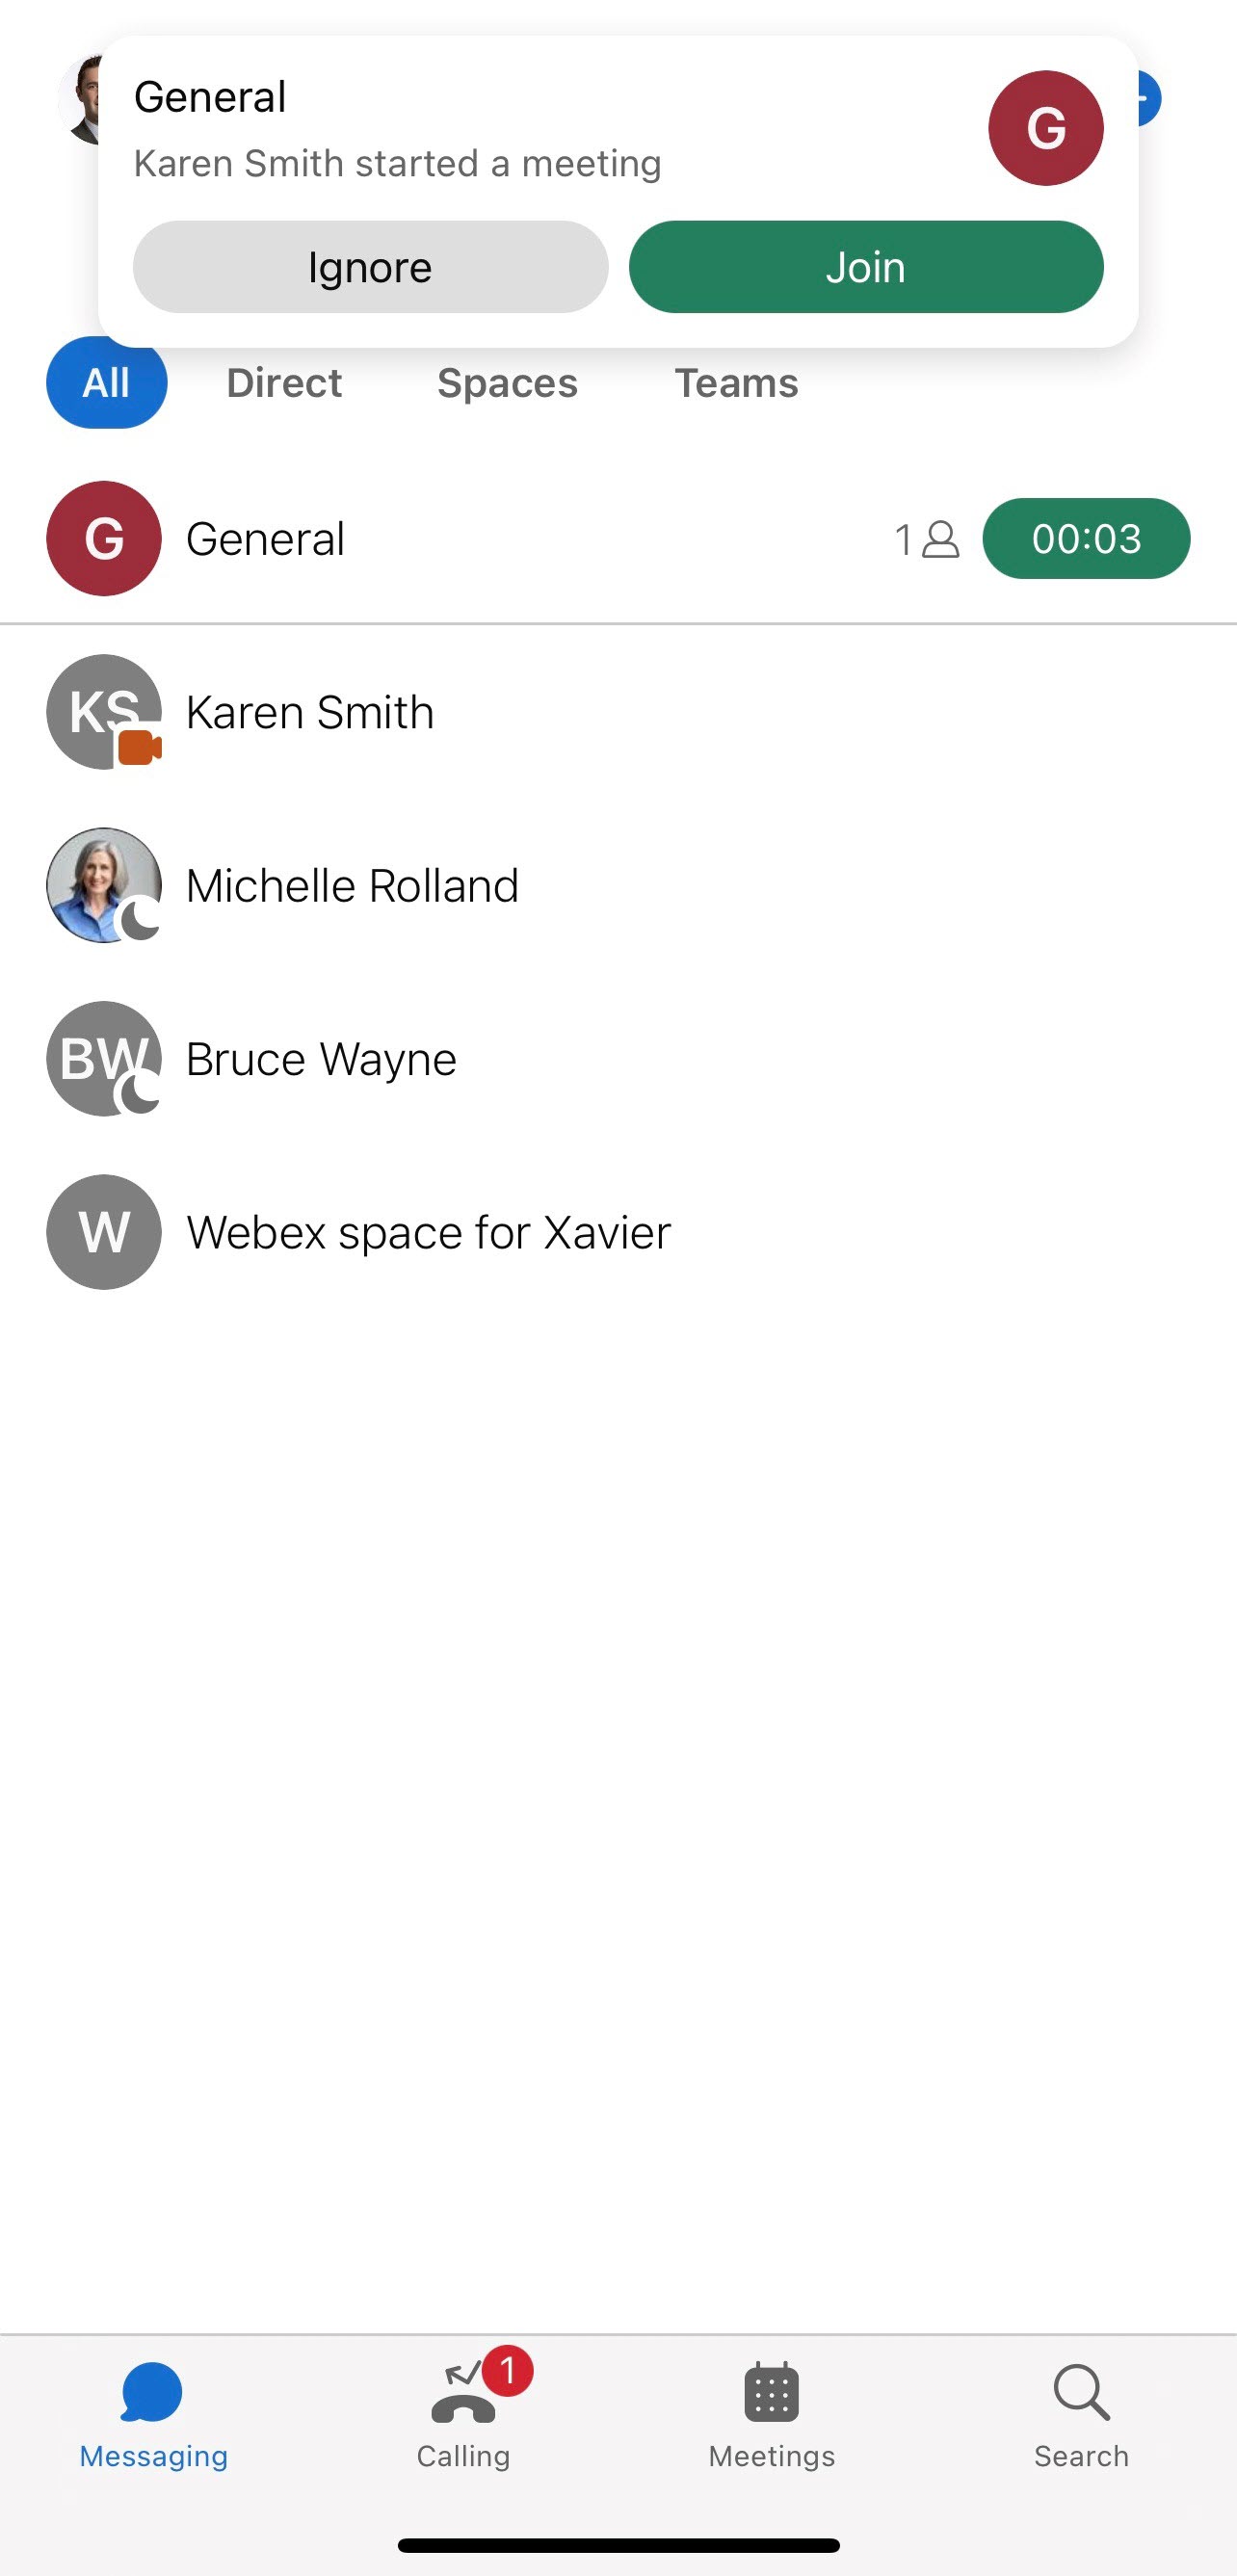
3. Choose your audio and video settings before you join your meeting.
4. When ready, click Join Meeting.